Difference between revisions of "UBIK Studio Basics"
(→Command line arguments) |
(→Database specific settings) |
||
| (3 intermediate revisions by 2 users not shown) | |||
| Line 30: | Line 30: | ||
{{Attention|Setting these command line arguments might changes the expected behavior of a data model significantly!}} | {{Attention|Setting these command line arguments might changes the expected behavior of a data model significantly!}} | ||
| − | + | ||
| − | + | ||
=== Options === | === Options === | ||
| Line 77: | Line 77: | ||
|} | |} | ||
| − | + | ||
| − | + | ||
===Database specific settings=== | ===Database specific settings=== | ||
| Line 110: | Line 110: | ||
|- | |- | ||
| ''SessionServiceUrl[:Port]''|| If the SessionManagementType is configured to use a LAS or GAS, the ServiceUrl of the AS must be configure here. In the case of an Local management, this setting is ignored.<br />The port number ''Port'' must be specified only if other than 443 (default for https). | | ''SessionServiceUrl[:Port]''|| If the SessionManagementType is configured to use a LAS or GAS, the ServiceUrl of the AS must be configure here. In the case of an Local management, this setting is ignored.<br />The port number ''Port'' must be specified only if other than 443 (default for https). | ||
| + | |- | ||
| + | | ''BinariesDeployment''|| Configure if the customizing binaries are distributed via a server file share or database. | ||
| + | |- | ||
| + | | ''LocalFileDeployment''|| Configure if the local file documents are distributed via a server file share or database. | ||
| + | |- | ||
| + | | ''Database TimeZone''|| Configure the time zone informatoin date - values are stored in the sql database. The default value is UTC | ||
|- | |- | ||
|} | |} | ||
| + | |||
| + | [[Category:2.5.1|UBIK Studio Basics]] | ||
| + | [[Category:Studio|UBIK Studio Basics]] | ||
==Working with {{UBIK}} Studio== | ==Working with {{UBIK}} Studio== | ||
| Line 253: | Line 262: | ||
{{Attention|Be careful, manipulating system objects might results in instability of {{UBIK}} Studio or other {{UBIK}} components!}} | {{Attention|Be careful, manipulating system objects might results in instability of {{UBIK}} Studio or other {{UBIK}} components!}} | ||
| − | + | ||
| − | + | ||
==See also== | ==See also== | ||
* [[:Category:Studio controls|Studio controls]] | * [[:Category:Studio controls|Studio controls]] | ||
* [[HowTo:Install_UBIK_Studio|How to install UBIK Studio]] | * [[HowTo:Install_UBIK_Studio|How to install UBIK Studio]] | ||
| + | * [[UBIK_Console]] | ||
{{Category/Version|2.5.1}} | {{Category/Version|2.5.1}} | ||
Latest revision as of 10:59, 22 December 2020
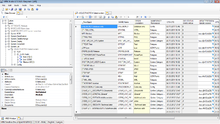
UBIK® Studio is the server application and administrative tool for creating and modifying UBIK® object models. It enables you to transfer your entity-relationship-model into UBIK® MetaClasses and MetaProperties and build up necessary relations. It is also the instrument of choice to manage instances of MetaClasses, edit their property values and create views and queries. This section will provide you with more information on the user interface.
Prerequisites
Command line arguments
The following arguments can be passed to and will be recognized by the UBIK.Studio.exe:
| Parameter | Purpose |
|---|---|
| -NOCUSTOM | Don't attempt to load the customized object code |
| -NOCUSTOMUI | Don't attempt to load the customized UI elements |
| -CUSTOMVERSION:version | Attempt to load a specific deployed version of the customizing instead of the currently released one. Use this option if you want to test a specific customizing, without releasing it to all users. |
| -CONNECTDB | Connects automatically to the most recently used database |
| -IGNOREUSAM | Ignores the Session Authorization and uses a fallback session if no authorization is granted by the Session |
| -DBMAINTENANCE:activity | Starts UBIK® Studio in maintenance mode. Possible activities are:
1 = recompiling of system structures; 2 = recreate MetaProperty views; 3 = recompile database; 4=Transfer Data to Attributes. Please do not use this option if you do not have any knowledge about these activities. |
| Setting these command line arguments might changes the expected behavior of a data model significantly! |
Options
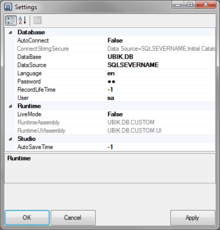
Locate and click the menu File → Options. Press Apply or OK when you're finished changing the options, or Cancel if you don't want your changes to be saved. The settings are user-specific and will be stored in your local Windows user profile.
In the options you can configure your database connection by the following parameters
| Parameter | Purpose |
|---|---|
| AutoConnect | If set to true, the system will attempt to automatically connect to the configured database on start up |
| DataBase | The name of the instance on the SQL Server |
| DataSource | The name of the SQL Server (specify a server via host name, UNC, IP, ...) |
| Language | Set the desired database language in ISO639-1 syntax |
| WindowsAuthentication | If set to true, the user and password parameter are ignored and UBIK tries to connect to the SQL Server using the Windows credentials. |
| User | SQL Server user name. Only used when WindowsAuthentication is set to false. |
| Password | SQL Server password. Only used when WindowsAuthentication is set to false. |
Take care that the specified SQL user has appropriate permissions on the database.
Additional options are
| Parameter | Purpose |
|---|---|
| RecordLifeTime | Set how long records are valid before they will be requeried for changes by the kernel; -1 to turn off |
| AutoSaveTime | Set how often UBIK® Studio should save all unsaved objects automatically, in minutes; -1 to turn off |
| NotifyOnError | Displays a notification if an error occurs; false to turn off |
| NotifyOnWarning | Displays a notification if a warning occurs; false to turn off |
Database specific settings
Once successfully connected to a database, the menu item Database → {database name} settings... becomes visible. As the name already states, these are settings that are specific to the very database you are connected to, hence changes also only apply to it.
The following parameters can be read, respectively edited here
| Parameter | Purpose |
|---|---|
| File store mode | readonly; UNC for a regular filesystem, Cloud for a cloud storage |
| Data path | The path to the root directory of the data storage for this database in UNC mode; In Cloud mode the path can be defined as a relative path within the specified cloud container, this parameter can be left empty when using its root directory level. |
| CloudStorageAccount | The name of your storage account from your cloud service provider; only evaluated if File store mode is Cloud |
| CloudStorageKey | The authorization key from your cloud service provider to access your cloud storage; only evaluated if File store mode is Cloud |
| Cloud container name | The name of the root cloud container where files for this database will be placed; only evaluated if File store mode is Cloud |
| Language count | readonly; The number of languages currently configured in UBIK® |
| Date format | The date/time format to use in this database in ISO8601 syntax |
| Root-Metaclass for Metaproperties | readonly; The MetaClass where new Metaproperties will derive from |
| Root-Metaclass for metaclasses | readonly; The MetaClass where new MetaClass will derive from |
| SessionManagementType | Configure the type of session management that must be used by all UBIK sessions: 0 = Single Local Management, 1 = LAS, 2 = GAS |
| SessionServiceUrl[:Port] | If the SessionManagementType is configured to use a LAS or GAS, the ServiceUrl of the AS must be configure here. In the case of an Local management, this setting is ignored. The port number Port must be specified only if other than 443 (default for https). |
| BinariesDeployment | Configure if the customizing binaries are distributed via a server file share or database. |
| LocalFileDeployment | Configure if the local file documents are distributed via a server file share or database. |
| Database TimeZone | Configure the time zone informatoin date - values are stored in the sql database. The default value is UTC |
Working with UBIK® Studio
Basic UI elements
Menu and toolbar
The top area of UBIK® Studio features a menu strip:
| Menu | Menu item | Shortcut | Purpose |
|---|---|---|---|
| File | New | Ctrl+N | No purpose yet |
| Open Database | Ctrl+O | Clicking the item itself will attempt to open the last configured database connection, its sub menu items will show the most recently used connections | |
| Clear recent list | - | Clears the list of recently used database connections | |
| Save All | Ctrl+S | Saves all unsaved objects of the current session to the database | |
| Options... | - | Opens the Options dialog | |
| Exit | - | Closes UBIK® Studio | |
| Database | |||
| {database name} settings... | - | Opens the specific settings dialog for the currently connected database; will only appear once you successfully connected to a database | |
| Manage Database... | - | Opens the Management dialog for the current database; will also appear if connection to the database failed | |
| Sessions... | - | Opens the Management dialog for the current database sessions; this menu entry is only available if there is session management configured in the database settings | |
| Custom System Objects... | - | Opens the Management dialog for custom system objects; will only appear once you successfully connected to a database | |
| Build | Rebuild... | F6 | Assembles the entire customizing code and displays the result in the compiler window |
| Rebuild and download... | Ctrl+F6 | Assembles the entire customizing code and attempts to deploy it according to the current database settings | |
| Tools | |||
| View Test Environment... | F6 | Opens the View Test Environment window | |
| Interface Manager... | F10 | Opens the Interface Manager window | |
| ACM Manager... | F11 | Opens the ACM Manager window | |
| Who-Bert | F12 | Opens the Code and Workflow debugging window | |
| View | New Working Window | Ctrl+W | Opens a new working window to host additional controls |
| Unsaved Objects Hierarchy | Ctrl+U | Opens a window showing all currently changed, yet unsaved objects in a hierarchical style | |
| Plugins | - | Opens the Plugin Modules window showing all currently loaded UBIK Plugins | |
| Event Tracer | - | Opens the Event Tracer window showing all events (errors, warnings, messages) that occured while running the Studio session | |
| Help | UBIK Wiki | F1 | Opens the UBIK® Wiki, meaning the root of this document |
| UBIK Class Documentation | Ctrl+F1 | Opens the help file with the UBIK® Class Documentation | |
| About | - | Opens a dialog with Version and Licensing information |
Status strip
The very bottom of the UBIK® Studio window displays a status strip, providing the following information, from left to right:
| Initial value | Purpose |
|---|---|
| DB | Current database: once connected, it will show the connection in the format Instance@Server |
| NOT INITIALIZED | Current Customizing: when successfully loaded, it will display the version information of the instantiated customizing assembly, -1.-1.-1 if loading failed |
| CULTURE | Current language and culture in ISO639-1 format |
| SESSION MANAGEMENT TYPE | Displays the type of session management in the current database; Doubleclicking the item opens the Session Manager Dialog for all sessions in the current database if a multi-session management type is used |
| SESSION | Displays the name of the Login of the current Session; Right click on this item to switch into Admin mode |
Status Notification
UBIK® Studio informs the user about important events happening within the UBIK system.Therefore the Status strip has a notification area on the right showing a yellow notification icon once there has occured an event the user should be aware of. These events are warning and error messages or also a reminder from the UBIK® Customizing Control to rebuild changed customizing code in order to provide the expected system behaviour. If there is a certain action involved to handle this notification, it is possible to get there immediately (e.g. open the Event Tracer window to review a warning) by clicking on the notification icon itself.
Working area and controls
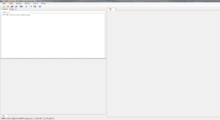
The main window of UBIK® Studio is split into 3 sections, where each of the 3 areas can hold an arbitrary amount of controls. The arrangement of the controls is user specific and can be saved in the user's profile. In addition to the predefined sections, the user interface can be extended with working windows, where each working window can again hold any amount of controls:
- View → New Working Window or Ctrl+W
However, such working windows are considered temporary and are therefore not made persistent when the layout is saved.
Using and connecting controls
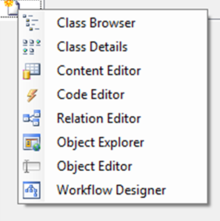
Each control provides different functionality for object creation/modification. Clicking the header of an empty tab strip in one of these areas with the left mouse button will bring up a context menu, that allows you to create a new tab page hosting one of the following controls:
| Control | Preview | Purpose |
|---|---|---|
| Class Browser | 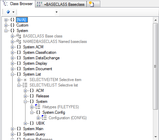 |
Navigate through, create and delete MetaClasses and instances |
| Class Details | 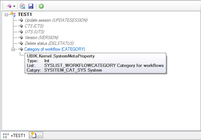 |
Design MetaClasses in their details; add/remove MetaProperties and classifications |
| Bulk Editor | 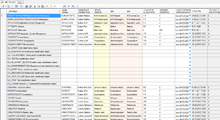 |
Create and edit multiple instances of a MetaClass in table style |
| Code Editor | 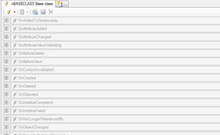 |
Implement MetaClass specific functionality using C# |
| Relation Editor | 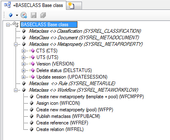 |
Relate objects to each others and edit relational data |
| Object Explorer | 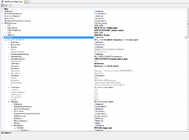 |
Display and edit all exposed properties of objects (list style) |
| Object Editor | 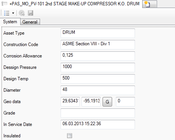 |
Edit the property values of a single object |
| Workflow Editor | 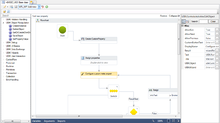 |
View, design and run customer specific workflows |
All controls in the UBIK® working area offer the following interaction functionality:
- Set a control as ListenTo source of another control by dragging an object from the source control and drop it on the header of the hosting tab of the target control
- Release ListenTo by clicking the respective header and selecting the ListenTo: control name menu item
- Reconnect to the last known ListenTo source (if applicable) by selecting the Reconnect to: menu item
- Close a control by right clicking the tab header and selecting the Close menu item.
| Drag&Drop with the right mouse button to only set the context object of a control, without connecting ListenTo |
| Drag&Drop an object at an empty tab strip will let you select the control afterwards and subsequently sets the context object |
User rights
As of now, UBIK® Studio doesn't feature a real user management system for designing data models. Although there is a distinction made between an admin and a non-admin user, with the very purpose of protecting system objects against unintended manipulation.
However, UBIK® fetches the current Windows user and creates the environment with this credentials, storing the login information on a Session object.
Admin mode
Right click on the user name in the status strip and select the menu item Admin mode to switch all active controls to Admin mode. As long as you are in admin mode, the user name in the status strip will appear red.
| Be careful, manipulating system objects might results in instability of UBIK® Studio or other UBIK® components! |

