Difference between revisions of "HowTo:Create Image Map Overlays"
(→Publish the map overlay) |
|||
| Line 19: | Line 19: | ||
#* Tutorial of Google Earth: [https://support.google.com/earth/answer/148099#createoverlay | Add a Map Overlay (Google How To German)] | #* Tutorial of Google Earth: [https://support.google.com/earth/answer/148099#createoverlay | Add a Map Overlay (Google How To German)] | ||
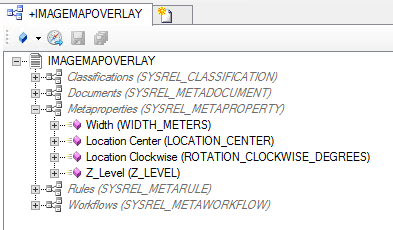
# Extract the required parameters: | # Extract the required parameters: | ||
| − | #* WIDTH_METERS: The width of the image in meters. Please use the measurement tool of Google Earth: [https://support.google.com/earth/answer/148134?hl=en | Measuring distances and areas | + | #* WIDTH_METERS: The width of the image in meters. Please use the measurement tool of Google Earth: [https://support.google.com/earth/answer/148134?hl=en | Measuring distances and areas] |
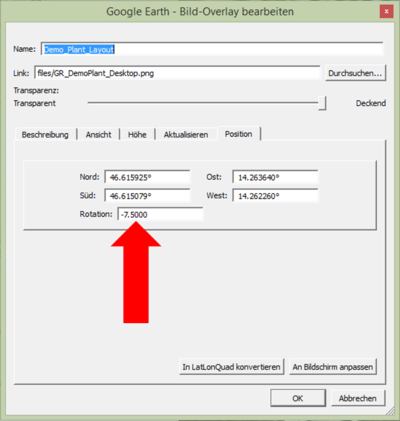
| − | #* ROTATION_CLOCKWISE_DEGREES: The rotation can be extracted by using the editing tool of Google Earth for image map overlays.{{Clear}} | + | #* ROTATION_CLOCKWISE_DEGREES: The rotation can be extracted by using the editing tool of Google Earth for image map overlays.{{Clear}}<br/>[[File:UI GoogleEarthImageEditing.PNG|400 px|border|alt=View|View]] |
#*LOCATION_CENTER: To extract this parameter it is required to use the Placemark tool of Google Earth and locate the placemark in the center of the image. How to use a placemark tool: [https://support.google.com/earth/answer/148142?hl=en | Creating a new placemark] | #*LOCATION_CENTER: To extract this parameter it is required to use the Placemark tool of Google Earth and locate the placemark in the center of the image. How to use a placemark tool: [https://support.google.com/earth/answer/148142?hl=en | Creating a new placemark] | ||
#** The location can be extracted by using the editing mode of the placemark. | #** The location can be extracted by using the editing mode of the placemark. | ||
| Line 54: | Line 54: | ||
# Check the Classification in the ACM Manager | # Check the Classification in the ACM Manager | ||
| − | + | ||
| − | + | ||
| − | + | ||
== Add an image map overlay == | == Add an image map overlay == | ||
Revision as of 11:20, 10 July 2015
Image map overlays will be visualized as base maps in the map activity of the client. These are images (.png) that will be vizualized on the right location, with the right scale and also with the right rotation. Therefore georeferencing of the image is required.
Basics
To configure the image map overlay two steps are required:
- Georeferencing of the image
- This is necessary to generate the required parameters.
- Prefered Software: | Google Earth
- How to add a map overlay to Google Earth is available there: | Add a Map Overlay (Google How To German)
- Configuration of the Image Map Overlay in UBIK Studio
- The MapOverlys are based on a File Documents, so basicly should contain the properties for the classification Document, Filedocument and MapOverlays


