RFID tags
In order for the users to find objects more efficiently, UBIK® objects can be marked with values for RFID/NFC codes. Whenever a user scans an RFID code, the resulting code value can be used to find all matching objects, namely objects that have the right property.
| NFC stands for "Near Field Communication" and is a set of ideas and technologies for data transfer between devices, typically in close distances. Technically, it is based on RFID ("Radio-Frequency Identification"), which describes specific technical solutions. |
Amongst the use cases for NFC, there is communication between smartphones and other devices, but also the scanning of RFID tags.
The UBIK® RFID scanning feature specifically is the ability to scan RFID tags in order to identify UBIK® objects.
WinX/Xamarin Internal Scanner
Supported RFID Tags
There are three types of RFID markers supported by UBIK®:
- NfcA (RFID standard: ISO-14443A)
- NfcB (RFID standard: ISO-14443B)
- NfcV (RFID standard: ISO-15693)
UBIK® WinX scans these tags for an NDEF message. Tags which are not NDEF formatted are not supported by the WinX client. UBIK® Xamarin instead just looks for the serial numbers of the tags and use them for searching.
Supported Devices
When your client supports NFC, you can see this by opening the side menu. If NFC is supported, a NFC button should be enabled.
Scanning an RFID tag
A NFC Scan button is shown in the Global App Bar if the device is capable of scanning NFC tags. Pressing the NFC Scan button enables/disables NFC scanning throughout the whole application. That means once the NFC scanning is activated, one can use the application just as usually while UBIK® scans for NFC tags in the background.
Presenting results of a search
Once a tag is successfully scanned, an object search is executed.
- if no objects are found a message is popping up at the right side of the screen.
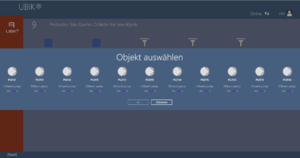
- if more than one object is found the results are represented in a separate view (dialog in WinX, side panel in Xamarin) along with their matching probability. One can than select one object that should be opened in the content browser.
- if exactly one object is found, this object is directly opened in the content browser.
Search modes
UBIK® provides two modes for searching objects: online and offline.
Searching offline
In any case (regardless of the network connection and sync mode), UBIK® always goes through all the objects currently available on the device and find the ones that match the scanned results.
Searching online
When the Internet is avaiable and UBIK® is not running under offline mode, the search result is enhanced by online search. This means any objects that match the scanned results can be found even if they don't yet exist locally.
Multiple codes on a single object
It's possible have multiple NFC/RFID codes on a single object. This allows the same object to be found when you scan any of those codes. For such objects, the general scan and potentially the search behaviors are exactly the same as those with only a single code. For example, if an object with multiple codes is found when you scan one of the codes, it could also get unlocked.
Scan to input mode
Instead of performing object searches for scan results, UBIK® can also use the scan results as input for property value editing. In this so called scan to input mode, no searches are performed.
At the moment, there is no standard UI to control this mode. However, it can be easily customized. The two relevant properties are:
- AppStatus.ToggleNfcScanToInput: Controls the scan to input mode. True to turn it on, false to turn it off so that it returns to the default scan to search mode. This value automatically resets to the default value false when a property edit session ends;
- AppStatus.NfcScanToInputResult: The last NFC/RFID scan result while scan to input mode is on. This value gets automatically cleared when a property edit session ends.
Classifications
In order for objects to be identifiable through RFID, they have to carry the SYSCLS OBJECTWITHRFIDTAG classification or (optional) the new SYSCLS OBJECTWITHRFIDTAGS .
The service query used for online searching is SYSCLS RFIDTAGSCANQUERY.
See also
WinX External Scanner
Since Version 3.6.0 - WinX it is possible to use external Bluetooth RFID Readers for Scanning RFID Tags.
Preliminaries
To use an external Bluetooth RFID Reader within UBIK®, the device has to be brought into the Bluetooth SPP (Serial Port Profile) Mode first. Check the manual of the device on how to do that. Once SPP is active, the reader has to be paired with the UBIK® host device. Afterwards it can be used for scanning RFID Tags.
RFID Configuration File
Information needed for communicating with an external Bluetooth RFID Reader are stored in a ".rfconfig file". This file has to be placed in the local RFIDConfiguration folder: {AppData}\LocalState\RFIDConfiguration\.rfconfig. The name of the ".rfconfig" file is irrelevant. The configuration file contains the following information:
| Information | Type | Description |
|---|---|---|
| ScannerIdentifier | String | The Bluetooth Name of the RFID Scanner. |
| DefaultScanning | Boolean (true,false) | Specifies wheter scanning is active as default or not. |
| IgnoreReply | Boolean (true,false) | Some Scanners might send reply messages once a Blue-tooth Command was applied. If IgnoreReply is set to true, these messages aren´t used for further processing. |
| Substring | String of format: x,y | Extracts a substring of the scanned RFID Tag for further processing. x…index of the first character y… length of the substring |
| Replace | String of format: x,y | Replaces a character of the scanned RFID Tag for further processing. x…old character y…new character |
| StartCommands | List of Strings | List of Bluetooth Commands that are send to the RFID Reader when scanning is started. |
| ScanningCommands | List of Strings | List of Bluetooth Commands that are send to the RFID Reader when a Tag got scanned. |
| StopCommands | List of Strings | List of Bluetooth Commands that are send to the RFID Reader when scanning is stoped. |
The ScannerIdentifier is typically the Bluetooth Name of the RFID Scanner. In some cases however it might deviate from the Bluetooth Name. The correct ScannerIdentifier can the be found in “Windows Settings>Devices and Printers>Right click on the Bluetooth Device>Properties>Services”. Bluetooth Commands are ASCII Strings which can be send to the RFID Reader in the SPP Mode in order to configure the device. These commands can be found in the documentation of the respective RFID Reader. Often they are terminated with a stop character like “\r”. An example of an .rfconfig file is given below. Note that elements of the configuration file have to be ordered alphabetically.
<RFIDConfiguration xmlns="UBIK.AR.RFID"
xmlns:i="http://www.w3.org/2001/XMLSchema-instance"
xmlns:a="http://schemas.microsoft.com/2003/10/Serialization/Arrays">
<DefaultScanning>false</DefaultScanning>
<IgnoreReply>true</IgnoreReply>
<Replace>),=</Replace>
<ScannerIdentifier>RNI-SPP</ScannerIdentifier>
<ScanningCommands>
<a:string>cw 0E,01\r</a:string>
</ScanningCommands>
<StartCommands>
<a:string>cw 04,00\r</a:string>
<a:string>cw 0E,01\r</a:string>
</StartCommands>
<StopCommands>
<a:string>cw 0E,01\r</a:string>
</StopCommands>
<Substring>0,18</Substring>
</RFIDConfiguration>
Start Scanning
There are two possibilities to start scanning using the configured RFID Reader: Either scanning is active per default (see RFID Configuration) or by pressing the RFID Scan button in the GlobalAppBar.
When pressing the RFID Scan button UBIK tries to establish a Bluetooth connection to the RFID Reader. This is indicated by a Progress Ring on top of the RFID Scan button. If no connection could be established, the RFID Scan button falls back to its original state.
If a connection was successful, the RFID Scan button appears toggled. Afterwards the StartCommands of the RFID Configuration are applied and UBIK starts to listen for Messages from the Bluetooth RFID Reader. That means one can use the application just as usually while UBIK® scans for RFID Tags in the background.
Scanning
Once scanning was successfully started as described above, UBIK is continuously listening for new Messages from the RFID Reader. When a RFID Tag gets scanned, the result is received and manipulated based on the RFID Configuration. If the Substring option is configured properly, a substring of the Message is extracted and used for further processing. If the Replace option is configured properly specified characters are replaced. Afterwards processing an action is triggered for the received Message. If a string editor is currently opened, the Message is written into the property field of the editor (Teach-In). Otherwise an object search is triggered. UBIK is then searching for Objects classified as SYSCLS OBJECTWITHRFIDTAG having the scanned content as the RFIDTag property value. Finally the ScanningCommands defined in the RFID Configuration are applied.
Stop Scanning
Scanning can be stopped manually by pressing the RFID Scan button in the GlobalAppBar or simply by switching off the RFID Reader. UBIK will notice the device got disconnected and will indicate so using the RFID Scan button state. If the RFID Reader is disconnected by pressing the RFID Scan button manually, StopCommands defined in the RFID Configuration are applied.
Troubleshooting
The RFID Scan Button is not visible. Check the following:
- Is there a .rfconfig file in the specified RFIDConfiguration folder?
- Is the .rfconfig file formatted properly?
- Are the elements of the .rfconfig file ordered alphabetically?
- Are the elements of the .rfconfig file of the correct type?
- Is the RFID Reader running in Bluetooth SPP Mode?
- Is the RFID Reader paired with the host device?
- In the .rfconfig file, does the specified ScannerIdentifier match the Bluetooth name of the RFID Reader?
Its not possible to start scanning. Check the following:
- Is the RFID Reader on and in the proximity of the host device?
- Try to restart scanning by again pressing the button
- Try to restart the RFID Reader
- Try to restart UBIK
UBIK does not find any RFID Objects. Check the following:
- Is the RFID Reader properly configured (Some readers need to get pre-configured using Bluetooth Commands in order to send scanned RFID Tags to UBIK – Check the manual)
- Try to open a String editor and scan a RFID Tag. Is the scanned message as expected?
- Are the Objects of interest classified as SYSCLS_OBJECTWITHRFIDCODE?
- Are the Objects of interest properly configured (property value equals the associated RFID Tag)?
- If no Online Query is defined, are the Objects of interest available locally?
Android (obsolete)
Supported RFID Tags
There are three types of RFID markers supported by UBIK®:
NFC Scan Result Type
Depending on the NFC Scan Result Type setting, UBIK® can extract different types of information from a scanned RFID tag:
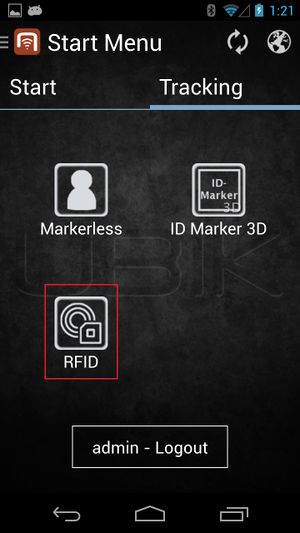
Configurable start screen RFID button
In order to use this feature, a RFID scanning entry point is provided using a configurable start start screen button. The following xml shows an example start screen configuration including RFID scanning entry point:
<Tab caption="Content">
<ContentBrowserButton caption="Content Browser"/>
<RFIDScanButton caption="RFID Scan" />
</Tab>
</StartScreenConfiguration>
Scanning an RFID tag
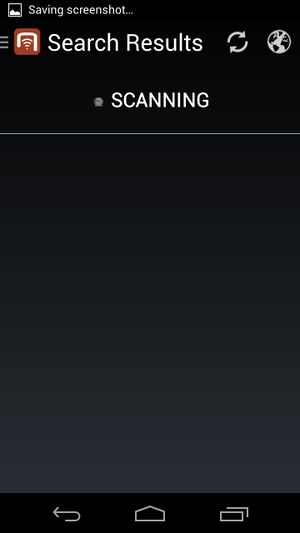
Once the RFID button in the start screen is clicked, the corresponding RFID scanner starts. The user is then able to scan RFID tags continuously.
Presenting results of a search
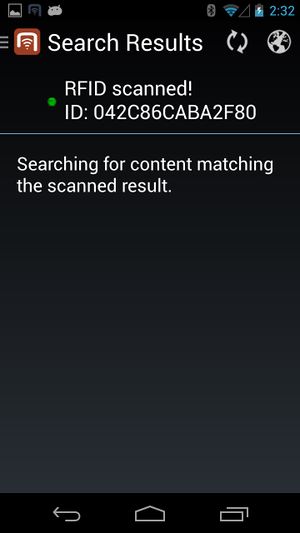
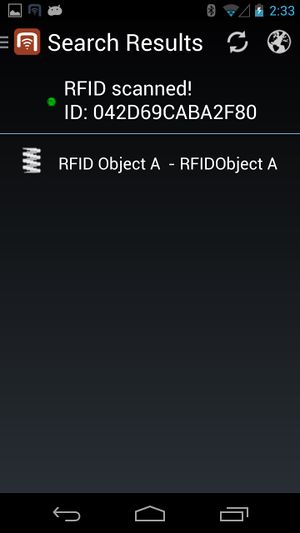
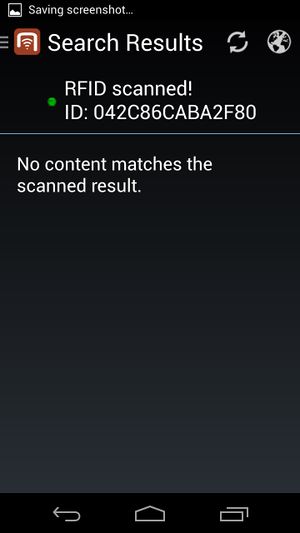
Once the ID of the tag is scanned, UBIK® starts searching for objects with the scanned RFID.
- During the search, the list might show a searching text before any objects are found;
- If any objects are found, they will be displayed in a list. The users can then browse to any of the objects for more information by clicking on the objects;
- If no objects are found, the list will show a corresponding text.
Searching Mechanism
UBIK® provides two mechanisms for searching objects: online and offline.
Searching offline
In any case (regardless of the network connection and sync mode), UBIK® always goes through all the objects currently available on the device and find the ones that match the scanned results.
Searching online
When the Internet is available and UBIK® is not running under offline mode, the search result is enhanced by online search. This means any objects that match the scanned results can be found even if they don't yet exist locally.
Technical background
In order for objects to be identifiable through RFID, they have to carry the SYSCLS OBJECTWITHRFIDTAG classification.
The service query used for online searching is SYSCLS RFIDTAGSCANQUERY.
See also


