Difference between revisions of "Map View (outdated)"
(→POI Details) |
(→POI details) |
||
| Line 94: | Line 94: | ||
[[File:UI_WinX_Map_POI_Panel.png|thumb|alt=POI Details Panel|POI Details Panel]] | [[File:UI_WinX_Map_POI_Panel.png|thumb|alt=POI Details Panel|POI Details Panel]] | ||
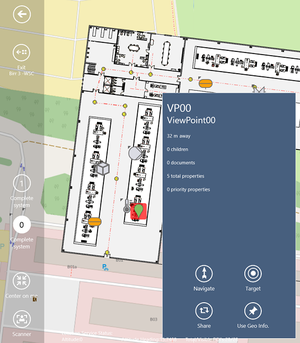
By clicking on an icon on the map, a details panel will be displayed on the right side of the map page. | By clicking on an icon on the map, a details panel will be displayed on the right side of the map page. | ||
| + | Another click on the selected POI will deselect it and dismiss the details panel. | ||
</tab> | </tab> | ||
</tabs> | </tabs> | ||
Revision as of 09:03, 11 September 2015
Map View is the view that displays Points of Interests (POI’s) on a base map.
Contents
Prerequisites
Android
Since UBIK® Android 2.5.0, Open Street Maps (OSM) is used instead of Google Maps; hence, no Google Play Services are required anymore ().
Up to Version 2.5.0 UBIK® integrates Google Maps which requires Google Play Services. If the latter is not available on a device, UBIK® can still be installed and most of its features will still function. However, the map view will not be accessible and a notification will be shown in that case ().
Windows
None
Visualization
Base map
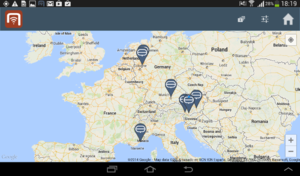
The base map typically displays all the Geo content according to the rules described below. Different objects are represented by different icons on the map.
The rules regarding what content should be displayed are as follows:
- The object has to be a Geo content
- If a POI group is currently open/active, objects that are shown are:
- POI group items that belong to the current group;
- Objects that are not POI group items;
- If a map layer is currently selected, objects that are shown are:
- Items of the current Map Layer;
- Objects that are not map layer items.
- If there is an object as the context of the map view (e.g. User opens a Geo content in the map), that object is displayed in addition to whatever else is.
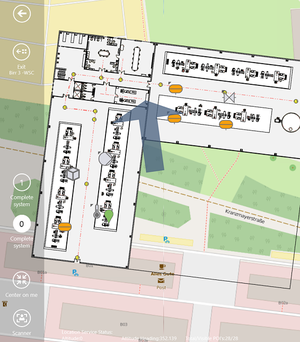
- If an Image Ground overlay is configured.
- This overlays are used to visualize building schemes on the map.
| Before Version 2.4.3 - Android objects had to be in the Infrastructure in order to be shown at all. |
Android
Home button
Pressing this button, opens a dialog box asking the user to specify where to navigate next. The user has the option of navigating to either the start menu, settings or the information view. To go back the map view without any selection the user must press the back button in the bottom navigation menu
Map settings button
By pressing this button, the user can change between Map (default setting), Satellite and Hybrid views. The map view changes the base map after clicking one of the radio buttons.
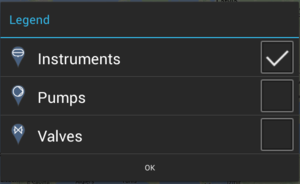
Map layers button
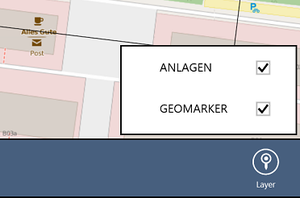
The Geo content can be configured on the server side to belong to a certain layer. By pressing this button, a dialog will be displayed to the user, containing all the available layers. By checking off the layers in the dialog box, the user is able to decide to view the Geo content belonging to the checked layers.
Windows
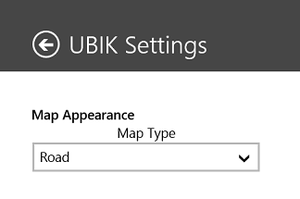
Map type setting
The user can choose different map types (Road and Satellite) for the base map. This setting can be found in the "Map" section of the application settings.
Map layers button
The Geo content can be configured on the server side to belong to a certain layer. By pressing this button, a panel will be displayed to the user, containing all the available layers. By checking off the layers in the dialog box, the user is able to decide to view the Geo content belonging to the checked layers.
Location button (Android)
This button enables the user to zoom into the current position of the mobile device.
Zoom buttons (Android)
The + button zooms into the map, the - button zooms out of the map.
Interaction
POI details
Map gestures
Zoom
- Two finger pinch/stretch.
Scroll
A user can scroll (pan) around the map by dragging the map with their finger
Android
Zoom
- Double tap to increase the zoom level by 1 (zoom in).
- Two finger tap to decrease the zoom level by 1 (zoom out).
- One finger zooming by double tapping but not releasing on the second tap and then sliding the finger up or down the screen to zoom in and out respectively.
Tilt
For versions using Google Maps instead of OSM (before 2.5.0), the map can be tilted. A user can tilt the map by placing two fingers on the map and moving them down or up together to increase or decrease the tilt angle respectively. This feature is not available anymore for newer versions ().
Rotate
For versions using Google Maps instead of OSM (before 2.5.0), the map can be rotated. A user can rotate the map by placing two fingers on the map and applying a rotate motion. This feature is not available anymore for newer versions ().
Windows
Rotate
A user can rotate the map by placing two fingers on the map and applying a rotate motion.
Custom marker
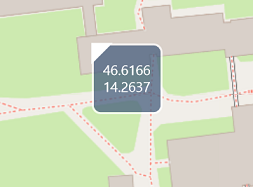
A user can place custom map location markers on the map by single tapping the target position of the base map. Doing so will also make the map center around the marked location.


