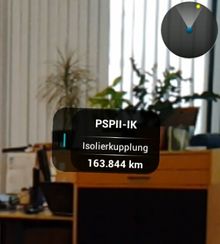
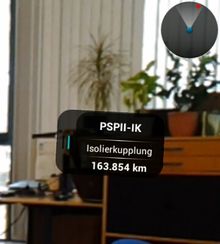
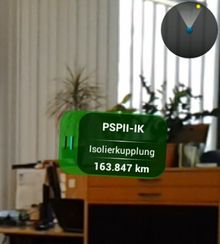
POI view is the Augmented Reality view that displays Points of Interest (POI's) related to the current location of the mobile device.
Visualization
A typical POI view consists of a real time camera view, a radar view and a few billboards.
Radar view
At the top right corner of the POI view, there is a circle shaped radar view which displays all the POI's as yellow dots. The positions of these POI's relative to the device are reflected and constantly updated in the radar view. If a billboard is currently selected (the last one touched), its dot in the radar view is marked with red color. POI groups are also represented as billboards in the radar view.
Billboard
Billboards are visual representations of POI's. A billboard consists of the following:
- Icon;
- Description text;
- Name text;
- Text of distance to the current location;
- Background color representing the status of the POI.
All these visual elements are updated when either the content or the current location changes.
Only Geo content are displayed as billboards. In addition:
- An object no longer has to be in the infrastructure in order to be shown;
| This was not the case before VersionAndroid |
- If a POI group is currently open/active, objects that are shown are:
- POI group items that belong to the current group;
- Objects that are not POI group items.
Interaction
Interacting with billboards
When a user touches a billboard, a content dialog for that particular POI will show up, providing the following further interations:
- Browse, which shows the POI object in a UBIK® content browser;
- Navigate, which opens a third-party application and navigate to the POI object's geo location.
| The Navigate option will not be available/visible if the POI object does not have any geo information. |
Scanning LLA markers
Under certain circumstances, users might want to specify a manual location instead of using the current location detected by their devices. This can be achieved by scanning an LLA marker in the POI view.
LLA only mode button
(Available since VersionAndroid)
Sometimes, it is necessary to temporarily turn on LLA only mode. For example, once the users enter a building where GPS or other locating systems are not reliable enough, they could, however, use the on-site LLA markers to precisely locate themselves. Afterwards, the LLA only mode can be turned off so that the users can continue to use the locating systems outside the building. UBIK® provides a LLA only mode button in the POI view for scenarios like this.
When LLA only mode is inactive, there should be a toggle button in the POI view:
- A single click on it would switch UBIK® from the current positioning mode to LLA only mode (PositioningMode set to LLA_ONLY_MODE);
- Another click from LLA only mode to the previous mode.
Since VersionAndroid, the LLA only button is also shown when LLA_MODE was active initially.
When LLA only mode is active, UBIK® ignores all other location updates except the ones from scanning LLA markers.


