Difference between revisions of "HowTo:Install UBIK Client Certificate"
m (→Certificate list) |
m |
||
| Line 1: | Line 1: | ||
This how-to describes how to set up a client certificate to enable a secure channel to the [[Web_Service|web service]]. | This how-to describes how to set up a client certificate to enable a secure channel to the [[Web_Service|web service]]. | ||
| + | |||
= Android = | = Android = | ||
| Line 40: | Line 41: | ||
{{Clear}} | {{Clear}} | ||
| − | + | = WinX / Web = | |
| − | + | The clients, either WinX or Web, need to have a certificate installed. This can be a root authority certificate or any other valid certificate enabling a secured connection between the {{UBIK}} Web Service and the clients. | |
| − | + | ||
| − | + | ||
| − | + | ||
| − | |||
=== Install Root Authority Certificate === | === Install Root Authority Certificate === | ||
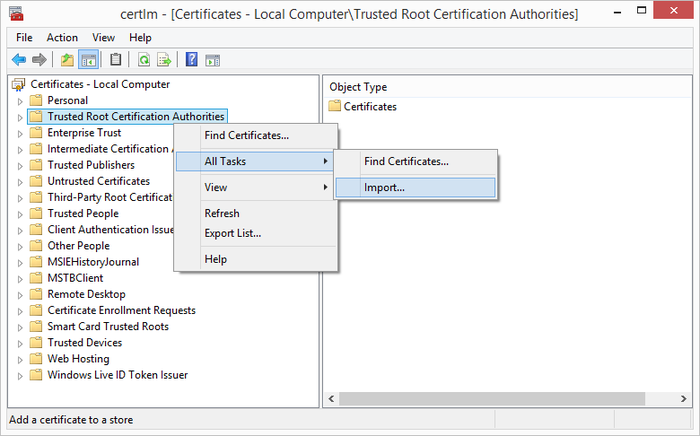
| − | + | To import the certificate, start the certificate manager by entering ''Manage computer certificates'' in the Windows Start Screen (alternatively, start the program ''certmgr''): | |
| − | + | ||
| − | To import the certificate, start the certificate manager by entering ''Manage computer certificates'' in the Windows | + | |
# Go to section ''Trusted Root Certification Authorities'' and open the context menu. | # Go to section ''Trusted Root Certification Authorities'' and open the context menu. | ||
# Click on ''All Tasks'' | # Click on ''All Tasks'' | ||
Revision as of 21:44, 13 February 2016
This how-to describes how to set up a client certificate to enable a secure channel to the web service.


