m (→Android) |
m (→Automatic Import) |
||
| (4 intermediate revisions by the same user not shown) | |||
| Line 1: | Line 1: | ||
| − | + | Setting up a client certificate for using a secure channel to the [[Web_Service|web service]]. | |
= Android = | = Android = | ||
=== Manual installation === | === Manual installation === | ||
| − | One can add server certificates to the {{UBIK Android}} application | + | One can add server certificates to the {{UBIK Android}} application in addition to the pre-installed certificates, using a button in the ''Info'' menu. {{Version/AndroidSince|2.3.1}} |
# Copy the certificate to your device's SD card where you can find it easily. | # Copy the certificate to your device's SD card where you can find it easily. | ||
| Line 22: | Line 22: | ||
=== Automatic Import === | === Automatic Import === | ||
| + | One can place certificate files in a predefined folder in order for them to be imported automatically when the app starts up the next time. {{Version/AndroidSince|2.5.1}} | ||
| − | + | The folder depends on the application: | |
| − | The folder depends on the | + | |
| − | + | ||
<pre> | <pre> | ||
<sd-card>/Android/data/com.augmensys.ubik.<custom_app>/files/cert | <sd-card>/Android/data/com.augmensys.ubik.<custom_app>/files/cert | ||
</pre> | </pre> | ||
| + | |||
=== Certificate list === | === Certificate list === | ||
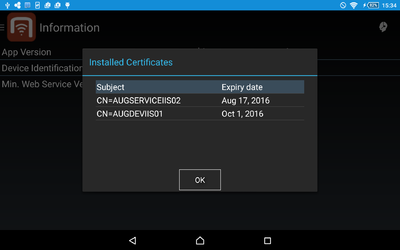
[[File:UBIK_Android_UI_Info_Activity_Certificate_List.png|400 px|thumb|border|alt=Certificate List|Certificate List]] | [[File:UBIK_Android_UI_Info_Activity_Certificate_List.png|400 px|thumb|border|alt=Certificate List|Certificate List]] | ||
| − | In the Info screen | + | In the Info screen, there is a button {{key press|Show certificates}} that opens a list of all installed certificates, displaying their subject and expiry date. {{Version/AndroidSince|2.5.1}} |
{{Attention|The certificate has to be provided as a X.509 DER encoded file, e.g. *.cer}} | {{Attention|The certificate has to be provided as a X.509 DER encoded file, e.g. *.cer}} | ||
| Line 39: | Line 39: | ||
{{Clear}} | {{Clear}} | ||
| − | |||
| − | |||
| − | |||
| − | |||
| − | |||
| − | |||
= WinX / Web = | = WinX / Web = | ||
| − | The clients, either WinX or Web, need to have a certificate installed if the connection to the web service should use secure communication (HTTPS). This certificate can either be a root authority certificate or any other | + | The clients, either WinX or Web, need to have a certificate installed if the connection to the web service should use secure communication (HTTPS). This certificate can either be a root authority certificate, a self-signed or any other public key certificate from a certificate authority enabling a secured connection between the web service and the clients. |
| − | If you already have a | + | If you already have a public key certificate available you can use this on the clients and web service. Otherwise you can create a certificate as described in [[HowTo:Create_UBIK_Web_Service_Certificates]]. |
| − | + | As the {{UBIK Web}} client connects to the content server similar as any mobile client it needs also to be authorized using a certificate. Hence, whatever machine hosts the {{UBIK Web}} client application needs to have the certificate installed. | |
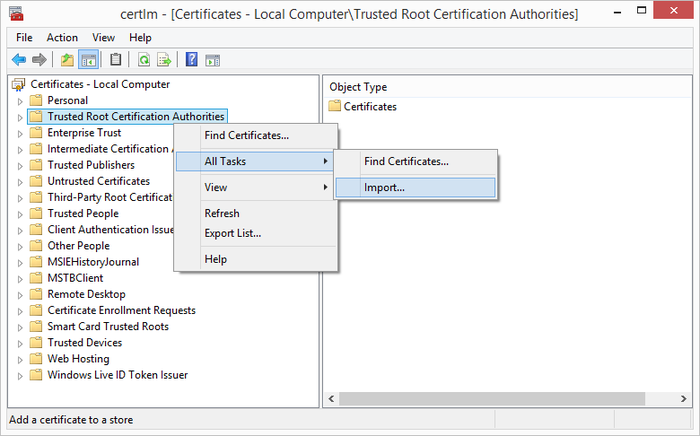
=== Install Root Authority Certificate === | === Install Root Authority Certificate === | ||
Latest revision as of 15:02, 2 May 2016
Setting up a client certificate for using a secure channel to the web service.

