
Difference between revisions of "HowTo:Customize Status LED on Mobile Client"
| Line 1: | Line 1: | ||
| + | {{DeprecatedStartTag}} | ||
| + | |||
It is possible to customize the [[Status Colour LED (UBIK Android)|status LED]] for applications on a mobile device. This can be done by simply placing/replacing the image file '''status_led.png''' in the [[UI_Configuration_(Mobile_Client)|UI Configurations folder]]. | It is possible to customize the [[Status Colour LED (UBIK Android)|status LED]] for applications on a mobile device. This can be done by simply placing/replacing the image file '''status_led.png''' in the [[UI_Configuration_(Mobile_Client)|UI Configurations folder]]. | ||
Latest revision as of 13:39, 23 June 2026
 |
THIS WIKI AREA IS DEPRECATED |
|
This content is no longer being maintained and may be outdated.
|
|
It is possible to customize the status LED for applications on a mobile device. This can be done by simply placing/replacing the image file status_led.png in the UI Configurations folder.
 | The recommended max resolution/dimension of the image file is 48x48 pixels for phones and 72x72 pixels for tablets. Once the image size exceeds the row height, the views might not be displayed in an optimal way. |
| The color of the image will affect the final color of the status LED. Therefore, it is recommended to use an image with light colors such as grey or white. |
The customization can be achieved through the following steps:
- Launch any file browser application;
- Choose an image file to be used as the status LED, rename it to status_led.png;
- Navigate to the predefined directory, create it if not found;
- Place the renamed file under the selected directory, replace the old file with the same name if exists.
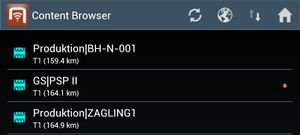
Default Status LED (Status Color: Orange)
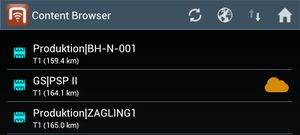
Custom Status LED (Status Color: Orange)


