
Xamarin XAML
The User Interface of the Xamarin Clients (Android, iOS, new UWP) can be fundamentally customized using custom XAML definitions. This customization process is heavily influenced by the XAML Customization Process on the WinX Client.
Contents
Basics
There are predefined XAML templates available that can be customized. If no customizing is found, the default templates will be used.
Default XAMLs
All default XAML templates that can be customized are available through the Xamarin.UWP client. You need to go to the app settings and click the "Unpack default XAMLs" button.
Differences to WinX/UWP
- Since it's based on the Xamarin XAML dialect, you CANNOT use any existing XAML customizings for the WinX/UWP app;
- Namespace definitions must include the corresponding assembly names;
- XAML template files have the extension name of xamlx instead of xaml;
- You can deploy only those resources that you want to customize. (This is also the case for newer versions of WinX/UWP. )
Overriding default XAMLs
On Windows (WinX/UWP), the [App Package Folder]/LocalState/xaml/ folder can be accessed by the user and the customized XAML files directly added. An alternative to this on all platforms (including Android, iOS, etc.) is to use the Import Customizing button in the app settings to import the templates, styles, images, etc. (file by file, or all files within a zip package). The changes should be reflected in the UI (except the current page) without restarting the app. After directly editing the customizings (Xamarin.UWP), you can also use the "Reload customizing" button without restarting the app.
In the following, we're going to override the default light theme color of the app:
- Unpack the default XAMLs;
- Pick and deploy the default UBIKThemes.xamlx to the xaml folder inside the LocalState folder;
- Open it with the text editor of your choice and remove everything within the ResouceDictionary except
<Color x:Key="UBIKLightThemeColor">blue</Color>; - Save the changes and reload. You should see changes successfully implemented.
| For maintainability reasons, it's HIGHLY recommended to deploy only those XAML resources you want to override. For example, if you only want to customize the UBIKChildArea, don't deploy others like the UBIKMenuArea. If you only want to customize the UBIKChildItem, that's the only content you should include in the UBIKThemes. |
Custom Templates
Custom templates can be added, just like on the WinX/UWP client. Make sure to include all namespace definitions (as attributes of the ContentView tag), otherwise the custom template will not load.
Similar to the UBIKThemes.xamlx file, custom or overridden templates start with a <ContentView> tag containing all namespaces. <ContentView.Resources> takes a ResourceDictionary and contains resources like references to converters. Finally, <ContentView.Content> contains the actual layout content (it's best to start with a Grid). Again, don't forget to add namespaces that you need!
Templates can also be defined in UBIKThemes.xamlx. In this case, they need to be added into the <ResourceDictionary> inside the <ContentView.Resources> template as a <DataTemplate>. Similarly, if you want to split up the templates into seperate files, you need to make sure to follow the steps mentioned above and get the content of the <DataTemplate> into the <ContentView.Content> tag.
| Templates defined in separate files will override templates defined in the UBIKThemes.xamlx! |
Bindings in resources
When using bindings such as this in a resource located in a custom template, it is necessary to place the template in a UBIKContentView.
| Technically speaking, this is because bindable objects in the ResourceDictionary of a ContentView (the custom template) don't automatically inherit the BindingContext from the container/parent view. UBIKContentView is created to additionally do that. |
<ContentView...
xmlns:controls="clr-namespace:UBIK.CPL.Controls;assembly=UBIK.CPL">
<ContentView.Resources>
<ResourceDictionary>
<controls:SfDataSourceExt... ItemsSource="{Binding Children.Items}" />
</ResourceDictionary>
</ContentView.Resources>
...
</ContentView>
<!-- Container where UBIKCustomView is placed, e.g. UBIKChildArea.xamlx -->
<ContentView...
xmlns:controls="clr-namespace:UBIK.CPL.Controls;assembly=UBIK.CPL">
...
<controls:UBIKContentView Content="{Binding [UBIKCustomView], Source={x:Static services:TemplateService.Instance}}" />
</ContentView>
Adding Images
Images can't be loaded with the default Image tag, as the image is on different paths on each operating system.
Therefore, there's a custom FileImage that internally overrides the default Image with two custom parameters:
- FolderName ...The name of the folder in the local folder. Only the first level inside the LocalState folder seems to work.
- FileName ...The name of the file in the said folder.
Make sure to implement the proper namespace as well by adding
xmlns:fimage="clr-namespace:UBIK.CPL.Controls;assembly=UBIK.CPL" into the root item's attributes.
Then, the image can be loaded using:
<fimage:FileImage FileName="image.png" FolderName="xaml"/>
This snipped loads the image called image.png located in the xaml folder inside the LocalState.
Furthermore, the FileImage tag doesn't seem to support most attributes. Therefore place it inside a Grid to achieve a perfect layout.
Converters
- Main Page: Converters In Xamarin
They are used to convert specific data into some desired output, using custom logic.
Consider the following example:
A label saying There are no children items available! should only be visible if the number of children-items is 0.
Advanced
Customizing Menu Button
For the Xamarin Client, it is possible to show/hide the Menu button of the client.
To customize the visibility of the Menu button you have to edit the default XAML Themes file.
- Search for "ShowMenuToolBar" in the Themes file.
If there isn't any "ShowMenuToolBar" in your XAML Themes file, you just have to create one, like this:
- Set the value to "true" to show the Menu button (default value).
- Set the value to "false" to hide the Menu button.

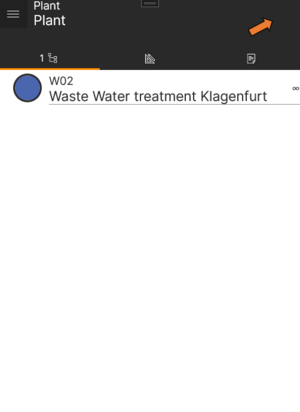
Menu Button shown
Menu Button hidden


Content filtering
For the Xamarin clients, an "SfDataSourceExt" type is available for filtering list of items using defined expressions.
The following example demonstrates how to filter for child items having certain property values. The filtered list and its count can be displayed in the UI.
xmlns:controls="clr-namespace:UBIK.CPL.Controls;assembly=UBIK.CPL"
...>
<ContentView.Resources>
<ResourceDictionary>
<x:String x:Key="Expresssion">Item.Values["MP_YEAR"].Contains("2019")</x:String>
<controls:SfDataSourceExt x:Key="FilteredList" Expression="{StaticResource Expresssion}" ItemsSource="{Binding Children.Items}" Unloaded="{Binding SkipFiltering}" />
</ResourceDictionary>
</ContentView.Resources>
<StackLayout Orientation="Vertical">
<Label Text="{Binding DisplayItemsCount, Source={StaticResource FilteredList}}" />
<controls:SfListViewExt ItemsSource="{Binding DisplayItems, Source={StaticResource FilteredList}}" />
</StackLayout>
</ContentView>
Notes on using bindings in ResourceDictionary
In the example shown above, you can see {Binding Children.Items} is used. For this to work, the SfDataSourceExt control inside the ResourceDictionary must inherit the binding data context properly.
- In this case, that data context comes from where this template (UBIKChildArea.xamlx) is used, namely the UBIKContentArea.xamlx;
- When referencing this template in a ContentView control, the binding data context is NOT automatically inherited by the controls inside the ResourceDictioinary;
- That's why we use a UBIKContentView control instead. You can find its example usage in the default UBIKContentArea.xamlx template.
Search
In the default UBIKMenuArea.xamlx (where the search UI is hosted), there are two commands associated with two events. See below.
<SearchBar.Behaviors>
<behaviors:EventToCommandBehavior
Command="{Binding FreeTextSearchCommand}"
CommandParameter="{Binding Path=Text, Source={x:Reference SearchField}}"
EventName="SearchButtonPressed" />
<behaviors:EventToCommandBehavior Command="{Binding DelayedFreeTextSearchCommand}" EventName="TextChanged" />
</SearchBar.Behaviors>
</SearchBar>
The one for SearchButtonPressed is responsible for executing searches after the user confirms the input (e.g. pressing Enter or the search button).
The one for TextChanged is responsible for the "search as you type" behavior. Namely it triggers an automatic search shortly (half second) after the user stops changing the text in the search bar. It can be turned off by simply removing that particular behavior.
DisplayViewCommand
This command can be used to display cutom views.
Performance
To get a good performance in the app UI when using your Xaml customizings, it is recommended to try the following.
- Always keep your UI structure simple. Choose the most efficient layouts for the scenarios and avoid unnecessary UI elements. Please refer to "choose the correct layout" and "reduce the visual tree size";
- Turn on layout compression on wrapping elements that don't have any visual parameters set (reasons stated in the linked documentation).
| There is a default "HeadlessLayout" style available in the app you can use on elements such as Grids, StackLayouts, ContentViews, etc. It turns on layout compression on the applied elements in Xamarin.Android (since we find it not worth the effort in Xamarin.iOS). |
| If possible, one should always favor designing the UI with less wrapping elements over turning on layout compression on unnecessary ones. |
General performance tips
- Reduce number of views per page
- Don’t bind things if they could be set static easily
- If you do not change the default, don’t set it explicit. For example, Orientation of StackLayout is “Vertical” by default. No need to set it manually if you don’t want to change it.
- Transparency is expensive.
- Use async/await to avoid blocking user interface.
- Do not put ListViews into ScrollViews.
- To stack elements, create a grid and add them to the same cell one after another. It’s cheaper than RelativeLayout.
- Use Margins instead of Paddings.
Layouts
- Choose correct Layout, e.g. no need to add a StackLayout if it only has 1 child.
- LayoutOptions.Fill or .FillAndExpand are best choice in most cases. And they are already default, so no need to set.
- Autosize of rows and columns in grids should used as few as possible.
- RelativeLayout is very expensive. Try to avoid.
- In StackLayout, make sure there is only 1 LayoutOptions Expand.
Labels
- Use FormattedText instead of multiple labels.
- Use Linebreakmode NoWrap (which is already the default).
- Avoid VerticalTextAlignment. Anyway, if needed, use VerticalTextAligment instead of VerticalOptions.
Images
- Provide images in optimized width and size. Provide multiple resolutions for different usage.
- Set IsOpaque to true if image is opaque.
Layout compression examples
The code above removes one wrapping element added automatically by the ContentView and demonstrates a good reason to use layout compression because it can not be avoided otherwise.
<Label Margin="5" Text="{Binding Title}" />
</Grid>
This example, on the other hand, demonstrates a bad usage of layout compression because it can be easily achieved by better designs such as using only the Label with a merged margin.
Sometimes the content inside a compressed layout appears on a wrong z-index level. For eample:
<ContentView ControlTemplate="{DynamicResource Badge}" Style="{DynamicResource HeadlessLayout}">
<Label Text="{Binding Title}" />
</ContentView >
According to the order of the BoxView and the Label, the latter should appear on top of the former (later ones have higher z-index levels). However, this can be disturbed by layout compression, causing the exact opposite.
In this case, you can add a xmlns:android="clr-namespace:Xamarin.Forms.PlatformConfiguration.AndroidSpecific;assembly=Xamarin.Forms.Core" namespace to your Xaml file and manually elevate the Label by specifying android:VisualElement.Elevation="X" on it accordingly (X is the delta of the z-index level you want).
SfListViewExt
For performance reasons, we created an extended version of the Syncfusion SfListView control and it should be used for all lists in customizings. You need to add a namespace like xmlns:controls="clr-namespace:UBIK.CPL.Controls;assembly=UBIK.CPL" to your Xaml file and use it like <controls:SfListViewExt ... />.
| Technically speaking, SfListViewExt informs item view models when their corresponding item views appear on / disappear from the screen. This way, view models can skip a lot of unnecessary work (on the UI) when their views are not visible. If SfListView is used instead, the item views will not reflect content changes until the page is reloaded/refreshed. |
It is possible to configure the ListView, that the ScrollPosition is remembered when navigating away from the page, to do so, the property RembemberScrollPosition needs to be set to true. If unset, the value defaults to false and the scroll positions are not remembered.
When using multiple Lists on one page (e.g. in a TabbedView), it is necessary to set the AutomationId property uniquely for each list on the page, to support the remembering of the ScrollPosition.
Known issues
When using a DataTrigger to set the properties of a footer for a ListView, the sequence of the properties inside the DataTrigger might matter in some cases. It seems to occur since Version 4.4 due to a Syncfusion update and could lead to the page not being rendered properly and appearing empty.
If you encounter such an issue, please workaround by adding the IsStickyFooter Property Setter on top inside the DataTrigger. Also, new customizings should consider this workaround as a preventive action.
<controls:SfListViewExt ...>
<controls:SfListViewExt.Triggers>
<DataTrigger TargetType="controls:SfListViewExt" Binding="{Binding Title}" Value="Administration">
<Setter Property="FooterTemplate" Value="{DynamicResource AddLoginFooter}" />
<Setter Property="FooterSize" Value="64" />
<Setter Property="IsStickyFooter" Value="True" />
</DataTrigger>
</controls:SfListViewExt.Triggers>
</controls:SfListViewExt>
<controls:SfListViewExt ...>
<controls:SfListViewExt.Triggers>
<DataTrigger TargetType="controls:SfListViewExt" Binding="{Binding Title}" Value="Administration">
<Setter Property="IsStickyFooter" Value="True" />
<Setter Property="FooterTemplate" Value="{DynamicResource AddLoginFooter}" />
<Setter Property="FooterSize" Value="64" />
</DataTrigger>
</controls:SfListViewExt.Triggers>
</controls:SfListViewExt>
Incorrect glyphs may be shown on buttons
When using glyphs on buttons in Xamarin, sometimes a different glyph than the expected one will show up when viewing the app on Android. They only seem to appear incorrectly when used as the Text property of the button (with FontFamily set to UBIKSymbols, such as the UBIKIconButton style.)
If you encounter this issue please workaround by supplying the icon through the FontImageSource property of the button.
<Button.ImageSource>
<FontImageSource
FontFamily="{DynamicResource UBIKSymbols}"
Glyph="{x:Static resources:UBIKIcons.MobileDelete}"
Color="{DynamicResource UBIKDarkThemeColor}"
Size="22"/>
</Button.ImageSource>
<Button.CommandParameter>
<classes:KeyValueList>
<classes:KeyValueParameter Key="Command" Value="DiscardContentCommand" />
</classes:KeyValueList>
</Button.CommandParameter>
</Button>
Buttons and gesture recognizers
In Xamarin XAML, you can use gesture recognizers on many UI elements such as a Grid to enable the latter to interact with user inputs.
However, we've already made quite a lot of experience that gesture recognizers do not always work on Android and iOS when used on a Button control. For example, the following Button won't properly invoke the command on said platforms.
<Button ...>
<Button.GestureRecognizers>
<TapGestureRecognizer Command="{Binding ReplicateAsDataCommand}" />
</Button.GestureRecognizers>
</Button>
Therefore, you should always seek alternatives for Buttons.
If only one command is needed, use the standard Command property on the Button, e.g.
<Button Command="{Binding ReplicateAsDataCommand}" .../>
Or if multiple commands are needed, use Behaviors instead, e.g.
<Button xmlns:behaviors="clr-namespace:UBIK.CPL.Behaviors;assembly=UBIK.CPL" ...>
<Button.Behaviors>
<behaviors:EventToCommandBehavior Command="{Binding ReplicateAsDataCommand}" EventName="Clicked" />
<behaviors:EventToCommandBehavior Command="{Binding NavigateBackCommand}" EventName="Clicked" />
</Button.Behaviors>
</Button>