Punch Points
Contents
Overview
The Punch Points feature in MaTaP are essential for managing and resolving issues during Turnaround and Project management. They facilitate efficient tracking and addressing of items that require attention, approval, or resolution, ensuring projects adhere to operational, safety, and quality standards.
Functionality
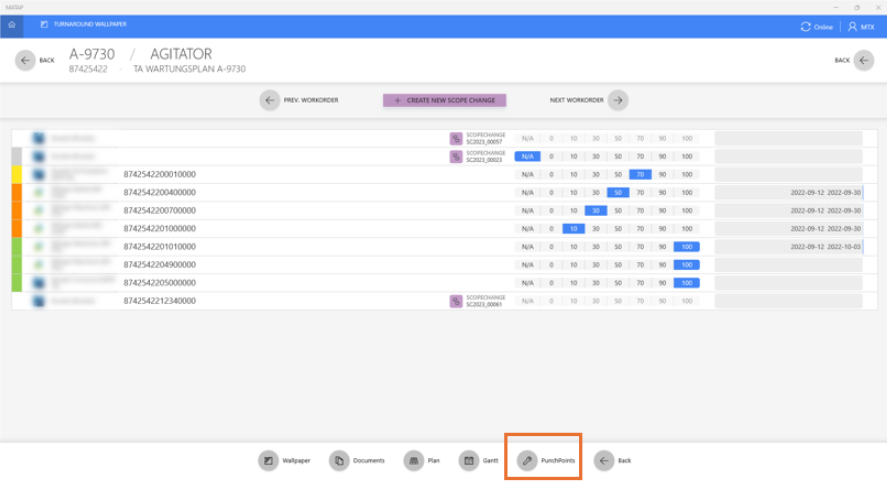
- Display and Overview: Punch Points can be accessed either for individual work orders:
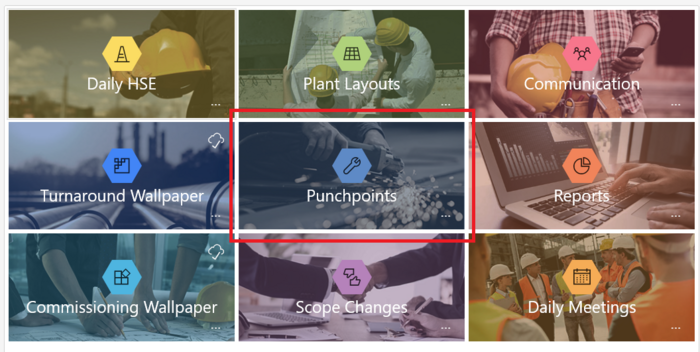
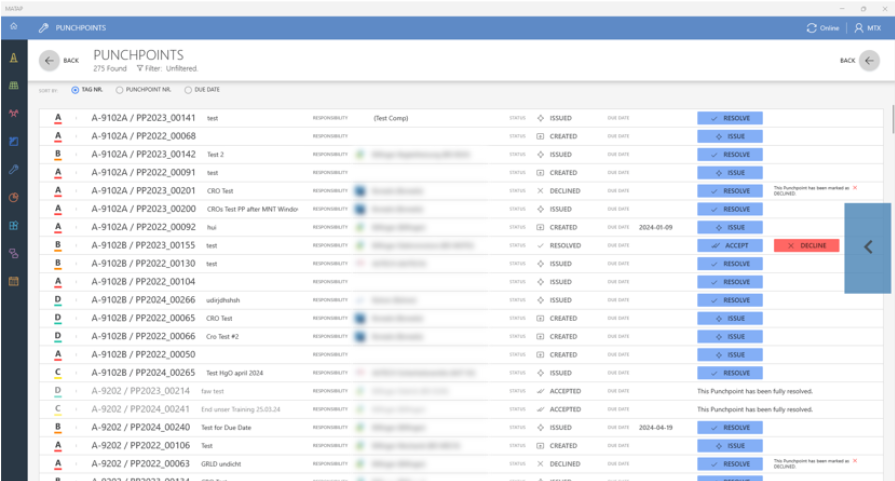
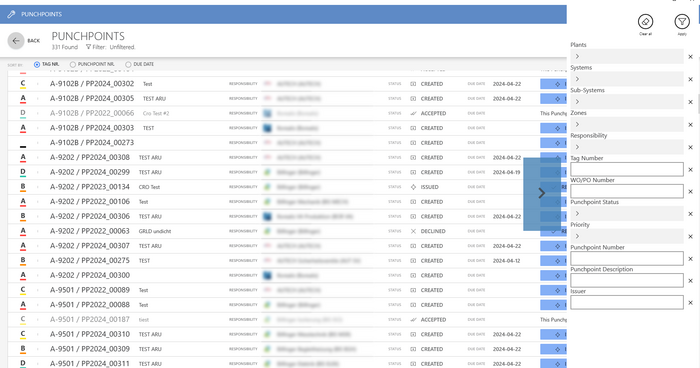
Or through a summarized view when entering the Punch Point functionality on the home page, which displays key details such as priority, punch point number, description, responsible contractor, and current status:
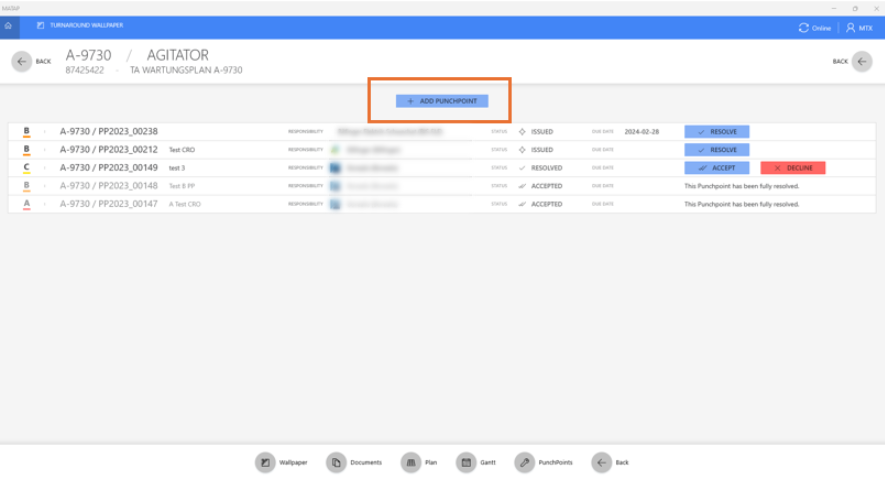
- Creation: Users can create Punch Points by navigating to the Punch Points tab of a work order and clicking the "+ ADD PUNCHPOINT" button, if they have the necessary user rights.
Authorities and Rights
Users are granted specific levels of rights, including Create, Issue, Resolve and Accept/Decline, allowing for different interactions with Punch Points based on the user’s assigned role. For more information about user rights please take a look at User Rights for MaTaP Users.
Workflow
1. Creation: Users begin by entering required details about the Punch Point, such as description, priority, and responsible company.
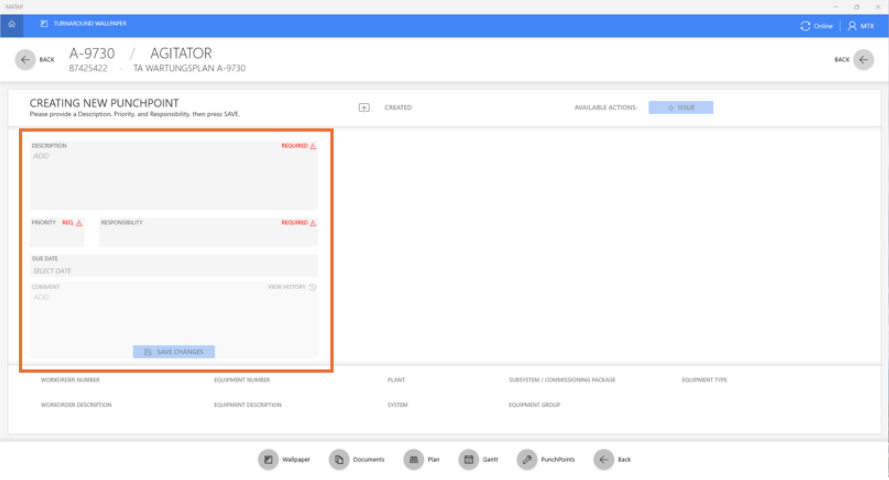
2. Issue: After creation, a Punch Point must be issued, limiting the editing of certain fields to those with approval rights.
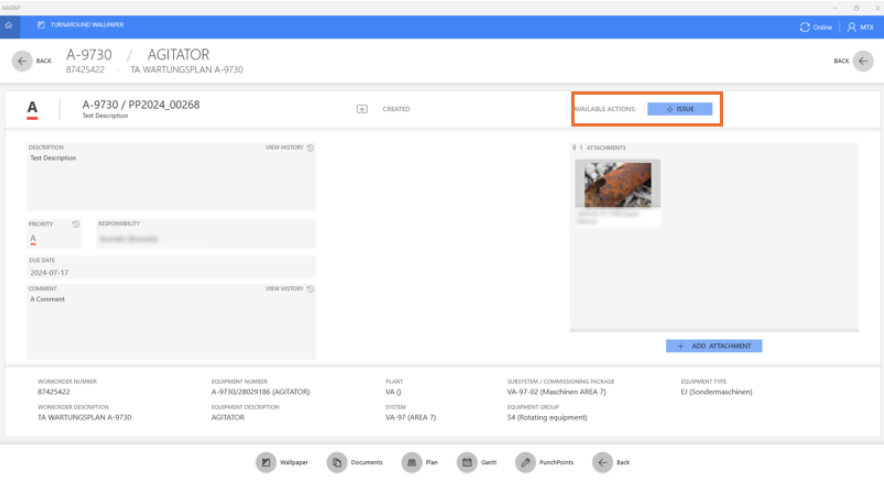
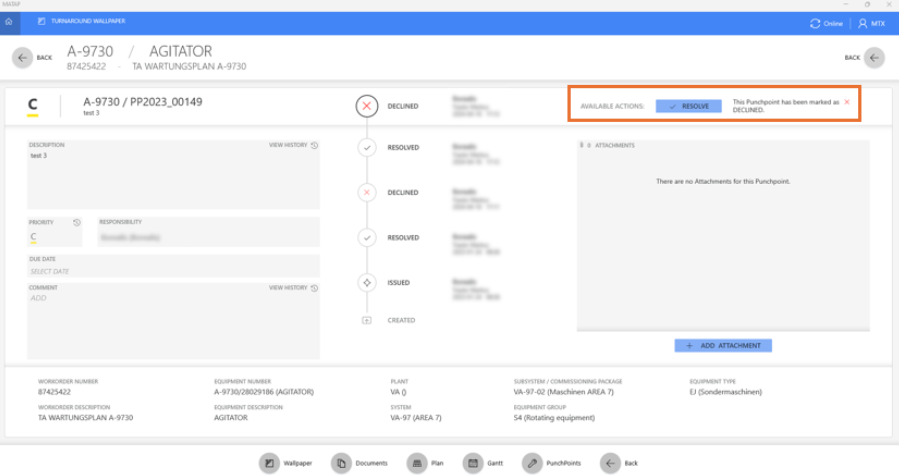
3. Resolve: The responsible contractor, with resolve rights, can resolve the Punch Point and submits it for review.
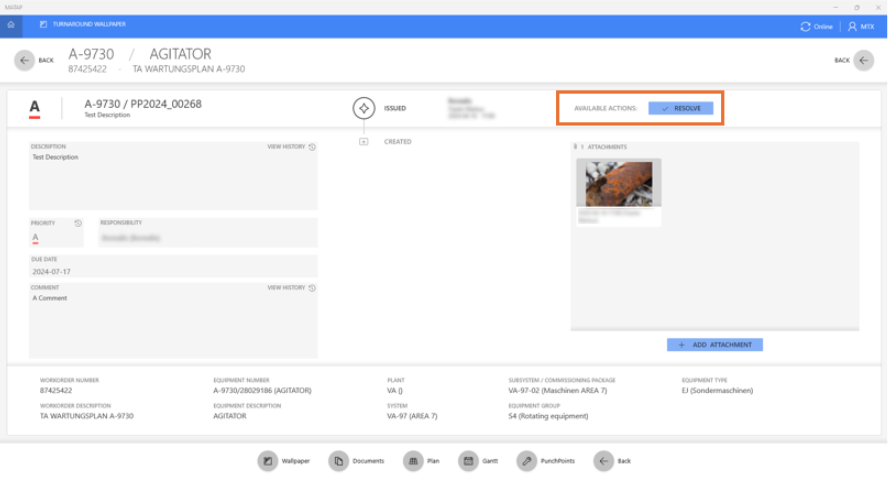
4. Approve/Decline:
- Approve: A Punch Point that fulfills all requirements can be approved.
- Decline: If a Punch Point is found lacking or needs additional work, it can be declined. The responsible contractor must then readdress the issues as specified.
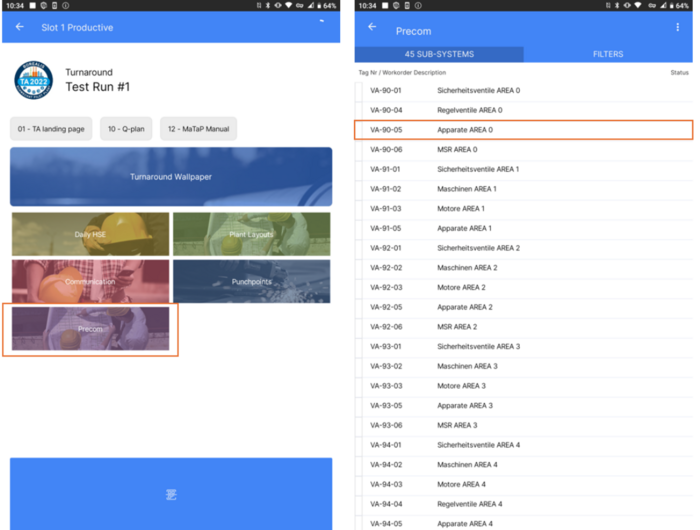
Precommissioning Use Case (Mobile Client Exclusive)
- Access and Navigation: This functionality is accessible from the mobile client's main/home page, where users can view and select SubSystems to explore associated work orders.
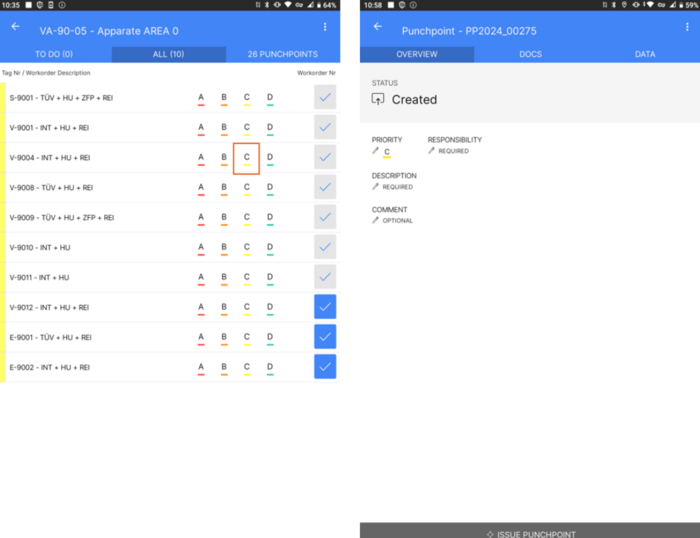
- Creating Punch Points: Users can instantly create Punch Points with predefined priorities ("A", "B", "C", or "D") by clicking corresponding buttons. After setting the priority, they fill out required and optional fields, then save the Punch Point.
- Saving and Workflow: The workflow for these Punch Points follows the standard process of issuance, resolution, and the approval/decline stages.
Attachments
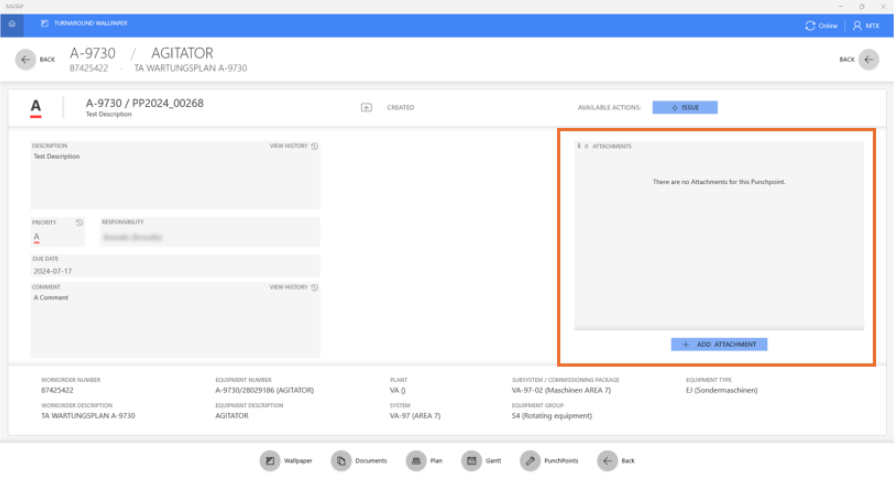
- Adding Attachments: Users can attach documents, images, or other files to a Punch Point for additional clarification and evidence. This feature supports supplying detailed descriptions or visual proofs that aid the resolution process.
- Management of Attachments: Attachments can be added or updated during the creation or modification of a Punch Point, restricted to users with appropriate rights.
Tracking and History
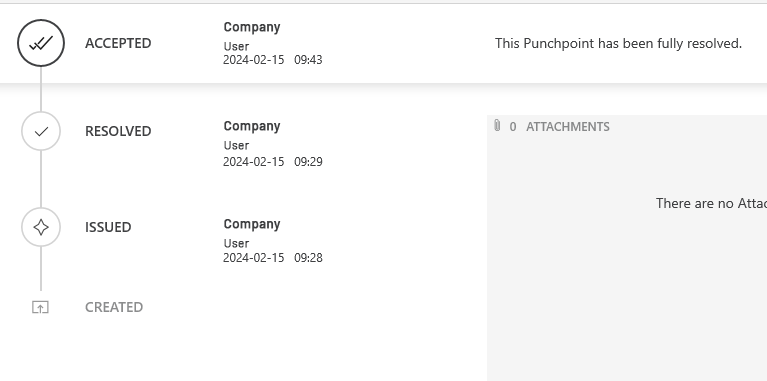
Every modification to a Punch Points status is displayed in the Workflow history section, detailing the timestamp, username, company, and current status.
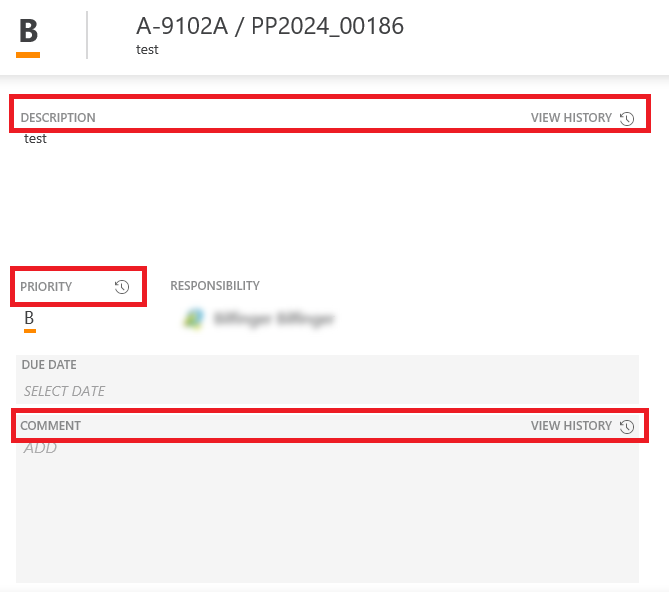
Moreover, there is a history available for the description, priority and comment, that can be assessed by clicking "VIEW HISTORY" for the property.
Searching and Filtering
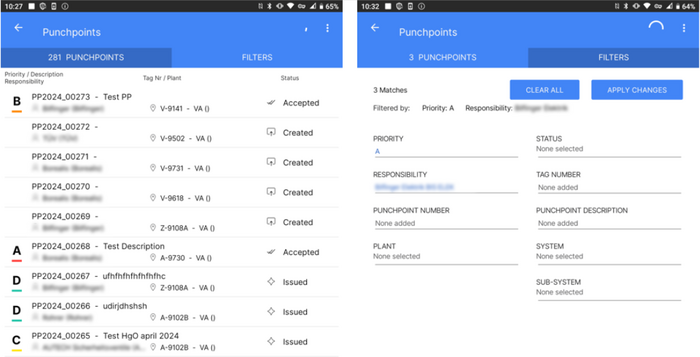
- Plant: Users can filter by specific plant locations. Selecting a plant is the prerequisite for further filtering by systems.
- System: After selecting a plant, users can filter by systems available within the chosen plant.
- Subsystem: Subsystems are available for selection only after a system has been selected, and only those subsystems that fall under the chosen system are available for filtering.
- Responsible Contractor: Filter by contractors responsible for addressing the Punch Points.
- Tag Number: Search using specific tag numbers associated with equipment or locations.
- Work Order/Project Number: Filter by specific work order or project identifiers.
- Status: Options include Created, Issued, Resolved, Accepted, or Declined.
- Priority: Filter by priority levels A, B, C, or D.
- Punch Point Number/Description: Search by specific punch point identifiers or descriptions.
- Issuer: Filter by the user who issued the Punch Point.
Desktop:
Mobile:
Integration with MaTaP Tools
- Desktop Client: Supports creation, management, and viewing of Punch Points within the Turnaround Wallpaper functionality.
- Mobile Client: Facilitates on-the-go management of Punch Points, ensuring timely updates and comprehensive management directly from the field.
- Admin Tool: Provides functionalities for administrative control over user rights and Punch Point configurations.

