Camera Calibration
Camera calibration needs to be done once per device model, for features requiring depth estimation (e.g. AR-Markers).
Prior to UBIK 4
Currently the following device models are pre-calibrated:
| Device Model | Operating System |
|---|---|
| Getac Z710 | Android |
| Sony SGP611 | Android |
| HTC One m7 | Android |
| Dell Latitude E5530 non-vPro | Windows |
| Dell Inc. Latitude 5591 | Windows |
| Durabook R11AH | Windows |
| Microsoft Corporation Surface Pro 4 | Windows |
| Hewlett-Packard HP Pro Tablet 408 G1 | Windows |
If your device is not yet calibrated, contact the development department. If calibration can´t be done by the development department follow the steps outlined in the following section.
Calibration Procedure
- Download the camera calibration application from the release portal.
- Download and print the asymmetrical circle calibration pattern.
- Verify the correct size by measuring the reference length on the upper right corner.
- Mount the calibration pattern on a planar surface.
- Install and open the Camera Calibration application.
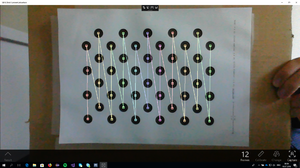
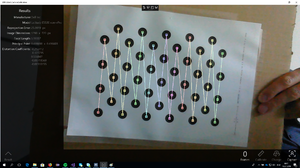
- Target the calibration pattern with the camera (the pattern gets augmented --> check if the augmentation is placed at the center of the circles before taking a calibration screenshot).
- Tap on the display to mark a frame for calibration. (Press the Capture Button on the WinX client)
- The calibration pattern should take up as much of the camera view as possible.
- Keep the camera and calibration pattern stable to not introduce blur.
- Take calibration frames from different viewpoints.
- Circles of the calibration pattern should also be in the corners of the camera view.
- Take as many calibration frames as possible (at least 30).
- After having enough calibration frames, open the menu and press calibration (Press Calibrate on the WinX client).
- On Android a toast indicates that calibration was done and shows the reprojection error. This error should be as low as possible (lower than 3). On the WinX client the result section can be expanded.
- The camera matrix and distortion coefficients are now saved on the device in the Downloads folder (in the LocalState folder on the WinX client). The device name is used as the filename of the textfile, on WinX the filename is CalibrationResult.txt
- Forward the calibration file to the development department.
UBIK 4
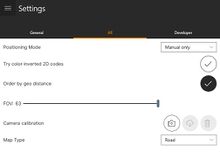
From UBIK 4 onwards, the camera calibration can be done directly on the device. Navigate to Settings -> AR and locate the section Camera Calibration. Right of it there are 3 buttons:
Start calibration (Camera symbol Android iOS)
- Download and print the asymmetrical circle calibration pattern.
- Verify the correct size by measuring the reference length on the upper right corner.
- Mount the calibration pattern on a planar surface.
- Target the calibration pattern with the camera (the pattern gets augmented --> check if the augmentation is placed at the center of the circles before taking a calibration screenshot).
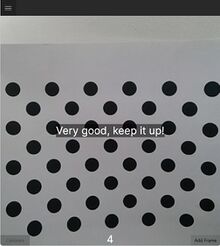
- Tap on Add Frame to mark a frame for calibration.
- The calibration pattern should take up as much of the camera view as possible.
- Keep the camera and calibration pattern stable to not introduce blur.
- Take calibration frames from different viewpoints.
- Circles of the calibration pattern should also be in the corners of the camera view.
- Take as many calibration frames as possible (at least 10).
- After having enough calibration frames, the Calibrate button will be enabled.
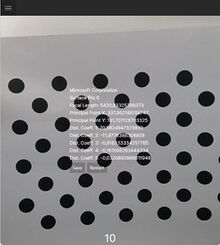
- Once pressed, the result of the calibration is shown on screen.
- Press "Save" to store the camera matrix and distortion coefficients on the device
- Press "Restart" to start a fresh calibration.
Return to the settings screen. You will now see text stating Device calibrated as [model] underneath the Camera Calibration label. Your device was successfully calibrated.
Export calibration (Download symbol Android iOS)
Exports the currently stored calibration of this device into a text file, that can be used for import on other devices of the same model. The resulting file will be presented in a share dialog.
Import calibration (Upload symbol UWP)
The native UWP client does not have the built in camera calibration feature, but it can import calibration files that were previously generated and exported from other clients.
Delete calibration (Trash bin symbol)
Deletes the currently stored calibration from this device. If no calibration values are stored, the system will use fallback values that are device-agnostic.

