The UBIK® compiler assembles and compiles customizing code into invokable .NET assemblies. It also creates the necessary tables, views and stored procedures in the database. In short: compiling a UBIK® data model is a necessary step to bring custom classes and their behavior to life.
User interface
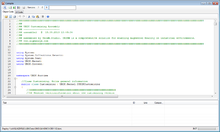
The UBIK® compiler can be accessed via UBIK® Studio's Build menu. Once launched, it will immediately start to fetch all available customizing code from the data model and assemble it into C# code. Depending on the size of the data model, this might takes a while. When finished, the assembled code is presented in the preview area.
Toolbar
| Item | Purpose |
|---|---|
| Compile database structure | Creates the necessary tables, views and procedures in the database; normally this is done by the Kernel on the fly while modelling, so using this menu item should only be necessary if you feel that something didn't end up correctly in the database |
| Check syntax | Compile the customizing code into .NET assemblies into a temporary assembly, for the purpose of safely checking the actual compiler output; use this option to see if your code actually works |
| Compile and test local | Compile the customizing code into .NET assemblies, without deploying them to the shared deployment path, i.e. without making it available to anyone else; use this option to test your customizing in your local {{UBIK} Studio before releasing it |
| Compile and release | Compile the customizing code into .NET assemblies, deploy them to the shared deployment path and mark the current version as released for everyone |
| Version major | Indicates the major version number of the customizing, which is always tied to the major version of UBIK®; it will be assembled into the code and can later be retrieved via the assembly's static VersionMajor property |
| Version minor | Indicates the minor version number of the customizing; click to increase manually; it will be assembled into the code and can later be retrieved via the assembly's static VersionMinor property |
| Version revision | Indicates the revision of the customizing; it is typically set to currently released revision + 1, can be increased manually by clicking on it; it will be assembled into the code and can later be retrieved via the assembly's static VersionRevision property |
| Version comment | Stores a comment to the current customizing version; after pressing ↵ Enter it will be assembled into the code and can later be retrieved via the assembly's static VersionComment property |
Preview area
The major portion of this window is consumed by the code preview area, which basically consists of two Code Editor components:
| Tab | Purpose |
|---|---|
| Object Code | This area holds the entire object code, consisting of generated code snippets for
|
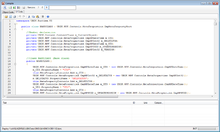
| UI Code | This area holds the code generated for the visual representation of MetaClasses and their MetaProperties, which is today comprised by a list of editing controls, one for each defined MetaProperty |
The code in the preview area can be modified. However, it is not recommended to do that since changes that are made here will not be saved back to the original objects. That means that the change will only be effective for the next compilation run, once the code is reassembled it will be lost.
Output area
The lower third of the window delivers output messages for the performed actions. If any error occurs, the corresponding line in the output stack will be colored red. On the left of the message is a small icon to indicate the type of message (error, success or warning). In the tool strip above is a toggle to activate and deactivate the output of warnings and trivial information. Success and error messages cannot be deactivated.
For the code-compiling actions, the native messages from the .NET compiler will be redirected here and linked to the source code in the preview area.
Status strip
On the very left, the status strip shows the path where released customizing assemblies will be deployed to. This path is defined by the setting data path and a trailing \bin\ directory. The right area features a progress bar, indicating the status of code assembling operations.


