To make the webservice accessible from a client, the client has to establish a secure connection to the webservice. Therefore, a certificate has to be provided and installed to the IIS server running UBIK. For demonstration and testing, a temporary developer certificate can be used which bases on a self-signed root certificate. The creation and installation of a self-signed certificate can be done in the following way:
Prerequisites
For the creation of development certificates either a visual studio development environment or a .NET framework SDK containing the certification tools is needed. For example, one of these packes can be installed:
- Microsoft Windows SDK for Windows 7 and .NET Framework 4; To save time and bandwidth selecting ".Net Development Tools" is sufficient for certification needs.
http://www.microsoft.com/en-us/download/details.aspx?id=8279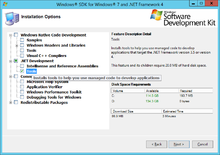
- Microsoft Visual Studio Express 2013 für Windows Desktop.
http://www.microsoft.com/de-at/download/details.aspx?id=40787

The binaries for “makecert” and "pvk2pfx" can be found here (can vary depending on the used packages):
- C:\Program Files (x86)\Microsoft SDKs\Windows\v7.1A\Bin
- C:\Program Files\Windows Kits\7.1\bin
- C:\Program Files (x86)\Windows Kits\8.1\bin\x64 or .\x86
To use the tools you basically need a windows command console window with admin-rights and the path varible set to the directory contaning the certification binaries. If a visual studio development environment is installed, you alternatively can start a "Visual Studio Development Console" out of the start menu.
Create self-signed Root Authority Certificate
This step can be ignored if there is already a root authority certificate installed to be used on the server and the client. If not, you can create a self-signed root authority certificate, provide this in the client's application package and use this as a basis for all webservices you want to acces with the client.
makecert -n "CN=<SELFSIGNEDNAME>" -r -sv <SELFSIGNEDNAME>.pvk <SELFSIGNEDNAME>.cer
SELFSIGNEDNAME ... self-signed root authority name
see MSDN
Example:
makecert -n "CN=Augmensys" -r -sv AugmensysCA.pvk AugmensysCA.cer
Create Temporary Service Certificate
To create a specific service certificate, we define the site name (IP) of our sevice along with the service name.
makecert -sky <SITENAME> -iv <SELFSIGNEDNAME>.pvk -n "CN=<SITE-IP>" -sv "<SITENAME>.pvk" -ic <SELFSIGNEDNAME>.cer <SITENAME>.cer -sr currentuser -ss My
SITENAME ... Name of the service
SITE-IP ... IP of the service (which should be accessed from the client)
See MSDN for details.
Example:
makecert -sky AugDemoIIS01 -iv AugmensysCA.pvk -n "CN=137.135.200.180" -sv "AugDemoIIS01.pvk" -ic AugmensysCA.cer AugDemoIIS01.cer -sr curren-tuser -ss My
While creating the certificate, the user is asked for a password to be entered, please remember this password as it it is used for further steps.
Convert Temporary Service Certificate for import in IIS
The created certificate has to be converted for importing it on an IIS service.
pvk2pfx -pvk "<SITENAME>.pvk" -spc "<SITENAME>.cer" -pfx "<SITENAME>.pfx" -pi <PASSWORD>
See MSDN for details.
Example:
pvk2pfx -pvk "AugDemoIIS01.pvk" -spc "AugDemoIIS01.cer" -pfx "AugDemoIIS01.pfx" -pi mysecretpassword
Now the certificate is ready to be imported on the IIS.
Configure IIS
- Import Root Authority Certificate
- Import the created PFX of the Service certificate
- Bind the used service certificate to the used https port number
- Ensure that the used https port is not blocked by the firewall
- Ensure that the https port is forwarded to the server if needed