Difference between revisions of "HowTo:Customize Status LED on Mobile Client"
| Line 19: | Line 19: | ||
# Place the renamed file under the selected directory, replace the old file with the same name if exist. | # Place the renamed file under the selected directory, replace the old file with the same name if exist. | ||
| − | <gallery widths=" | + | <gallery widths="300" heights="150"> |
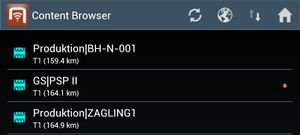
File:UI_Android_Default_Status_LED.jpg|Default Status LED | File:UI_Android_Default_Status_LED.jpg|Default Status LED | ||
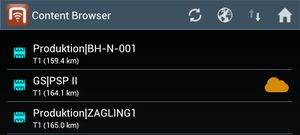
File:UI_Android_Custom_Status_LED.jpg|Custom Status LED | File:UI_Android_Custom_Status_LED.jpg|Custom Status LED | ||
Revision as of 07:45, 7 May 2014
It is possible to customize status LED for applications on a mobile device. This can be done by simply placing/replacing the image file SD_CARD/Android/data/APP_PACKAGE_NAME/files/UIConfigurations/status_led.png where
| Parameter | Purpose |
|---|---|
| SD_CARD | represents the root of the external storage of a device |
| APP_PACKAGE_NAME | is the concatenation of "com.augmensys.ubik." and the application name, e.g. demo, manualtest, companyname etc. |
The customization can be achieved through the following steps:
- Launch any file browser application;
- Choose an image file to be used as the status LED, rename it to "status_led.png";
- Navigate to the predefined directory, create it if not found;
- Place the renamed file under the selected directory, replace the old file with the same name if exist.


