Difference between revisions of "Camera Calibration"
(→Calibration Procedure) |
(→Calibration Procedure) |
||
| Line 33: | Line 33: | ||
* The camera matrix and distortion coefficients are now saved on the device in the Downloads folder. The device name is used as the filename of the textfile. | * The camera matrix and distortion coefficients are now saved on the device in the Downloads folder. The device name is used as the filename of the textfile. | ||
* Forward the calibration file to the development department. | * Forward the calibration file to the development department. | ||
| + | |||
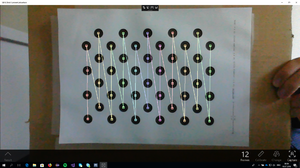
| + | [[File:CameraCalibrationScreenshot.png|thumb|Camera Calibration Application (WinX)]] | ||
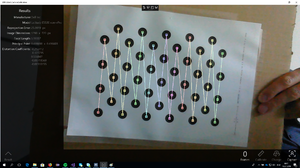
| + | [[File:CameraCalibrationResultScreenshot.png|thumb|Camera Calibration Result (WinX)]] | ||
Revision as of 07:19, 10 July 2018
Camera calibration needs to be done once per device model, for features requiring depth estimation (e.g. AR-Markers). Currently the following device models are calibrated:
| Device Model | Operating System |
|---|---|
| Getac Z710 | Android |
| Sony SGP611 | Android |
| HTC One m7 | Android |
If your device is not yet calibrated, contact the development department. If calibration can´t be done by the development department follow the steps outlined in the following section.
Calibration Procedure
- Download and the camera calibration application from the release portal.
- Print the asymmetrical circle calibration pattern from the release portal.
- Verify the correct size by measuring the reference length on the upper right corner.
- Mount the calibration pattern on a planar surface.
- Install and open the Camera Calibration application.
- Target the calibration pattern with the camera (the pattern gets augmented --> check if the augmentation is placed at the center of the circles before taking a calibration screenshot).
- Tap on the display to mark a frame for calibration.
- The calibration pattern should take up aus much of the camera view as possible.
- Keep the camera and calibration pattern stable to not introduce blur.
- Take calibration frames from different viewpoints.
- Circles of the calibration pattern should also be in the corners of the camera view.
- Take as much calibration frames as possible (at least 30).
- After having enough calibration frames, open the menu and press calibra-tion.
- A toast indicates that calibration was done and shows the reprojection er-ror. This error should be as low as possible (lower than 3).
- The camera matrix and distortion coefficients are now saved on the device in the Downloads folder. The device name is used as the filename of the textfile.
- Forward the calibration file to the development department.


