Difference between revisions of "HowTo:Find Objects by Optical Codes"
(→See also) |
|||
| (6 intermediate revisions by 3 users not shown) | |||
| Line 1: | Line 1: | ||
| − | + | Finding objects via a Barcode or QR-Code on the {{UBIK Client}} implies that a [[FAQ:Client#tab=Android|recommended application]] is installed on the device. Additionally the objects and the system needs to be prepared as described by these [[HowTo:Make_an_Object_be_found_by_Optical_Codes|instructions]]. This guide describes how to use the features on the client. | |
== Start a scanner == | == Start a scanner == | ||
| − | # Press one of the optical code scanning buttons in the | + | # Press one of the optical code scanning buttons in the top bar or in the start screen.<br/>[[File:TopBarButtons.PNG|440 px|border]][[File:StartButtons.PNG|220 px|border]] |
| + | #Select the optical code type on the left side<br/> [[File:Opical Scan.PNG|100 px|border]] | ||
| + | |||
| + | |||
| + | {{attention|From version 2.4.3 on, the context sensitive action bar doesn't contain the scanning buttons anymore. | ||
| + | Instead, the scanning menu can be found in the navigation drawer (to be opened by clicking on the app's icon).}} | ||
| + | {{attention|From version 2.4.4 on, the Getac Z710's integrated barcode/qr-code scanner is used if available. In the default configuration, it makes a very loud beeping sound though. You might want to switch that off in the Getac's settings (not in the UBIK settings - this is outside our control).}} | ||
== Scan an optical code == | == Scan an optical code == | ||
| Line 18: | Line 24: | ||
* [[HowTo:Make_an_Object_be_found_by_Optical_Codes]] | * [[HowTo:Make_an_Object_be_found_by_Optical_Codes]] | ||
| − | [[Category: | + | [[Category:Android|Find Objects by Optical Codes]] |
| − | [[Category: | + | [[Category:How-To|Find Objects by Optical Codes]] |
| − | [[Category: | + | [[Category:Publishing|Find Objects by Optical Codes]] |
Latest revision as of 12:27, 9 January 2020
Finding objects via a Barcode or QR-Code on the UBIK® Client implies that a recommended application is installed on the device. Additionally the objects and the system needs to be prepared as described by these instructions. This guide describes how to use the features on the client.
Start a scanner
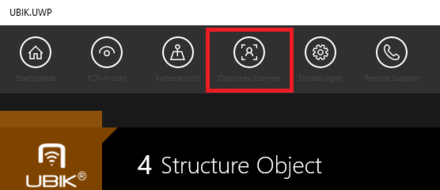
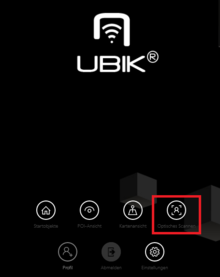
- Press one of the optical code scanning buttons in the top bar or in the start screen.
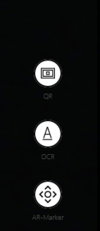
- Select the optical code type on the left side


| From version 2.4.3 on, the context sensitive action bar doesn't contain the scanning buttons anymore. Instead, the scanning menu can be found in the navigation drawer (to be opened by clicking on the app's icon). |
| From version 2.4.4 on, the Getac Z710's integrated barcode/qr-code scanner is used if available. In the default configuration, it makes a very loud beeping sound though. You might want to switch that off in the Getac's settings (not in the UBIK settings - this is outside our control). |
Scan an optical code
- Position the device in a way that the optical code is visible and stable in the camera view;
- Wait until the optical code is recognized by the scanner.

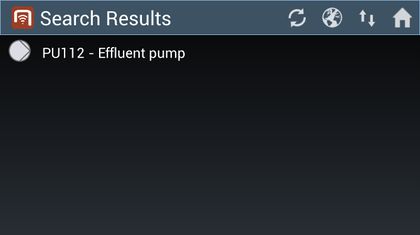
Wait for the search to finish
- Once the scan is finished, wait until the scanner is closed and an empty browser shows up;
- Depending on the network connection and the UBIK® sync mode, different ways of searching will be applied;
- During the search, the list might show a searching text before any objects are found;
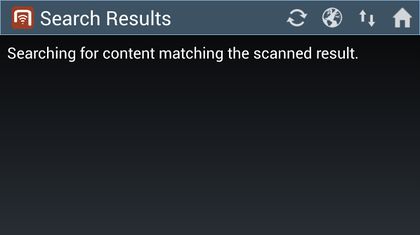
- If any objects are found, they will be added to the list.