
Difference between revisions of "HowTo:Create a new Workflow"
| Line 1: | Line 1: | ||
| − | [[Category:Workflow]] | + | To create and save a new workflow you will need to do the following steps: |
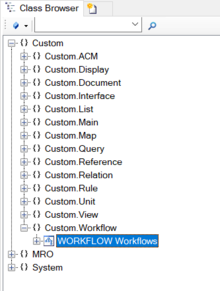
| − | [[Category:Studio]] | + | #Navigate to the [[MetaClass]] ''WORKFLOW'' via the ''[[Class Browser]]''.<br/> [[File:Workflow_MC.PNG|220 px|border]] |
| − | [[Category: | + | #Create a new object in the {{Bulk Editor}}. |
| + | #*Set a '''Name''' and '''Description'''. | ||
| + | #*Save the object with {{key press|Ctrl|S}}. | ||
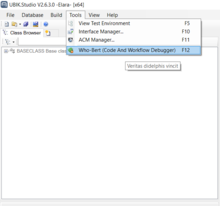
| + | #Open the tool Who-Bert in Ubik Studio. <br/> [[File:Who-Bert.PNG|220 px|border]] | ||
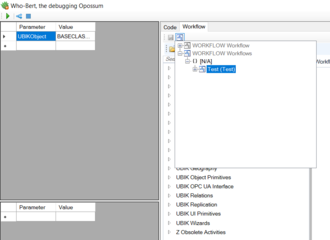
| + | #Open the newly created empty workflow. <br/> [[File:Workflow-Test.PNG|330 px|border]] | ||
| + | #Now it is possible to design the workflow and save it within the database. | ||
| + | |||
| + | [[Category:How-To|Create a new Workflow]] | ||
| + | [[Category:Studio|Create a new Workflow]] | ||
| + | [[Category:Workflow|Create a new Workflow]] | ||
Latest revision as of 07:21, 8 January 2020
To create and save a new workflow you will need to do the following steps:
- Navigate to the MetaClass WORKFLOW via the Class Browser.
- Create a new object in the Bulk Editor.
- Set a Name and Description.
- Save the object with Ctrl+S.
- Open the tool Who-Bert in Ubik Studio.
- Open the newly created empty workflow.
- Now it is possible to design the workflow and save it within the database.


