Difference between revisions of "HowTo:Configure Dynamic AR Content"
(→Setup) |
(→Example) |
||
| (67 intermediate revisions by 6 users not shown) | |||
| Line 1: | Line 1: | ||
| − | |||
The Dynamic AR Content feature allows the user to see different content according to a marker configuration. | The Dynamic AR Content feature allows the user to see different content according to a marker configuration. | ||
The configurable content are 3D objects, movies and {{UBIK}} objects. Currently this feature is enabled for ID Markers and Markerless scanning, meaning image tracking. | The configurable content are 3D objects, movies and {{UBIK}} objects. Currently this feature is enabled for ID Markers and Markerless scanning, meaning image tracking. | ||
Therefore, every time the user has scanned an ID marker or a picture, the corresponding object (3D object, movie or {{UBIK}} object) will be processed and, according to the configuration, displayed on the screen. | Therefore, every time the user has scanned an ID marker or a picture, the corresponding object (3D object, movie or {{UBIK}} object) will be processed and, according to the configuration, displayed on the screen. | ||
| − | = | + | = Prerequisites = |
| − | In order | + | In order to be able to use the feature properly, a certain folder structure is required and can be found at the following link {{FileLink|Dynamic_AR_Content_Folder_Structure.rar|Dynamic_AR_Content_Folder_Structure.rar}}. Since version 2.4.4, the schema changed slightly (downwards compatible). The updated example package can be found here: {{FileLink|Dynamic_AR_Content_Folder_Structure_244.zip|Dynamic_AR_Content_Folder_Structure_244.zip}} |
| − | # A root folder, named ''UBIK'' | + | The setup folder contains: |
| − | # The ''UBIK'' root folder contains a child folder, named ''ARConfig'' | + | # A root folder, named ''UBIK'' |
| − | # The ''ARConfig'' contains two child folders named ''IDMarker'' and ''Markerless'' | + | # The ''UBIK'' root folder contains a child folder, named ''ARConfig'' |
| − | ## ''IDMarker'' folder contains the resources and configuration files needed for scanning an | + | # The ''ARConfig'' contains two child folders named ''IDMarker'' and ''Markerless'' |
| − | ## ''Markerless'' folder contains the resources and configuration files needed for scanning a picture | + | ## ''IDMarker'' folder contains the resources and configuration files needed for scanning an ID marker |
| − | # ''IDMarker'' and ''Markerless'' folder contain a ''res'' and a ''conf'' folder | + | ## ''Markerless'' folder contains the resources and configuration files needed for scanning a picture |
| − | to | + | # ''IDMarker'' and ''Markerless'' folder contain a ''res'' and a ''conf'' folder |
| − | + | ## The ''res'' folder contains all the resources to be shown, like 3D objects, videos and links to {{UBIK}} objects | |
| − | + | ## The ''conf'' folder contains all the configuration files | |
| − | + | ||
| − | + | A senseful configuration always consists of a '''tracking configuration''' (in one of the TrackingData.xml) and a corresponding '''action configuration''' (in the parallel ActionMapping.xml). So when the pattern, configured in tracking, is recognized by the camera, the configured action is triggered. | |
| − | + | The following shows an exemplary sketch of the folder structure: | |
| − | + | ||
| + | <source lang="xml"> | ||
| + | /UBIK/ARConfig/ | ||
| + | IDMarker | ||
| + | conf | ||
| + | TrackingData_Marker.xml | ||
| + | Action_Mapping.xml | ||
| + | res | ||
| + | .obj | ||
| + | .png | ||
| + | .jpg | ||
| + | .mtl | ||
| + | .3g2 | ||
| + | .md2 | ||
| + | Markerless | ||
| + | conf | ||
| + | TrackingData_Game.xml | ||
| + | Action_Mapping.xml | ||
| + | res | ||
| + | .obj | ||
| + | .png | ||
| + | .jpg | ||
| + | .mtl | ||
| + | .3g2 | ||
| + | .md2 | ||
| + | </source> | ||
| + | |||
| + | = Tracking Setup = | ||
| + | The first step is to configure the tracking data Xml in order for {{UBIK}} to recognize scanned pictures and ID's. In case the marker is a picture (image), the location of the picture must also be provided. In the example it is '''../res/pic_name.(png, jpeg)'''. The ID located in the tracking data Xml should be the same as the order of the ID in the list of IDs. | ||
| + | |||
| + | The example below show the configuration of the location of the image: | ||
| + | <source lang="xml"> | ||
| + | <SensorCOS> | ||
| + | <SensorCOSID>1</SensorCosID> | ||
| + | <Parameters> | ||
| + | <referenceImage widthMM="420" heightMM="297">../res/img_pic.png</referenceImage> | ||
| + | </Parameters> | ||
| + | </SensorCOS> | ||
| + | </source> | ||
| + | |||
| + | {{Attention|The ID must be an integer number and it is not allowed to leave gaps, otherwise tracking wont work!}} | ||
| + | |||
| + | = Action Setup = | ||
| + | |||
| + | After the folder is configured, the next step is to validate the schema against an online validator. A solution can be found at [http://www.utilities-online.info/xsdvalidation/ Online XML Schema Validator]. The schema used to validate against can be found inside the example package provided in the prerequisites section (xml_schema_xsd). | ||
| + | Since version 2.4.4, GeometryAction derives from UBIKObjectAction. When a geometry is clicked, it will try to find the respective UBIK object and show a dialog for it. | ||
| + | |||
| + | The action mapping Xml contains different actions such as | ||
| + | * GeometryAction (3D Object) | ||
| + | * MovieAction | ||
| + | * UBIKObjectAction | ||
| − | + | The following Xml shows an example configuration: | |
| − | The | + | |
| − | + | ||
<source lang="xml"> | <source lang="xml"> | ||
<TrackingActionMapping> | <TrackingActionMapping> | ||
| − | <GeometryAction TrackingID="1"> | + | <GeometryAction TrackingID="1"> |
| − | + | <!-- Since 2.4.4, you can use a UBIK-UID for linking an POI dialog to the geometry. --> | |
| − | + | <!-- Alternatively, you can configure (by customizing) an object with Marker Classification and its Marker ID set to the Tracking ID of this action. --> | |
| − | + | <UBIK-UID>a5aa5a70-591f-11e3-949a-0800200c9a66</UBIK-UID> | |
| − | + | <GeometryResource> | |
| − | </GeometryAction> | + | <ResourcePath>pump.obj</ResourcePath> |
| + | <Scale>100</Scale> | ||
| + | </GeometryResource> | ||
| + | </GeometryAction> | ||
| − | < | + | <GeometryAction TrackingID="2"> |
| − | + | <GeometryResource> | |
| − | + | <ResourcePath>pump.obj</ResourcePath> | |
| − | + | <Scale>100</Scale> | |
| − | + | <RotationDegrees> | |
| − | + | ||
<Z>90</Z> | <Z>90</Z> | ||
| − | + | </RotationDegrees> | |
| − | + | </GeometryResource> | |
| − | </GeometryAction> | + | </GeometryAction> |
| + | |||
| + | <UBIKObjectAction TrackingID="3"> | ||
| + | <!-- Alternatively, you can configure (by customizing) an object with Marker Classification and its Marker ID set to the Tracking ID of this action. --> | ||
| + | <UBIK-UID>a5aa5a70-591f-11e3-949a-0800200c9a66</UBIK-UID> | ||
| + | </UBIKObjectAction> | ||
| − | |||
| − | |||
| − | |||
| − | |||
</TrackingActionMapping> | </TrackingActionMapping> | ||
</source> | </source> | ||
| − | |||
| − | All | + | All Action tags must specify a TrackingID attribute, where ID value must exist in the corresponding tracking Xml within a ''<SensorCOSID>'' tag. |
| − | in the tracking | + | |
| + | {{Attention|If a texture is used for a geometry, the material (*.mtl file) and the texture (picture) must all exist in the same place in order for to have the 3D object displayed properly, Only the geometry has to be specified as a resource in the Action Mapping, though.}} | ||
| − | === GeometryAction Tag === | + | === Displaying 3D objects === |
| + | |||
| + | 3D objects can be displayed using the ''<GeometryAction>'' tag. The sub-tag ''<GeometryResource>'' defines the content and the parameters for displaying the 3D object. | ||
| + | |||
| + | ==== UBIK-UID Tag ==== | ||
| + | |||
| + | Available since version 2.4.4: | ||
| + | Just like the UBIKObjectAction, this action allows the usage of a optional UBIK-UID tag, specifying the ID of a UBIK object. | ||
| + | If it is specified, the respective object is linked to this geometry; else, it is tried to find an object with a marker classification and the geometry action's tracking ID for it's marker id value. | ||
| + | When the user clicks on the geometry, a dialog is opened for the linked object (if found). | ||
| − | |||
| − | |||
==== GeometryResource Tag ==== | ==== GeometryResource Tag ==== | ||
The GeometryResource contains: | The GeometryResource contains: | ||
| − | # '''Resource path''' | + | # '''Resource path''': the resource path of the 3D object or video to be displayed. |
| − | # '''Scale''' | + | # '''Scale''': if specified, the 3D object will be scaled to this size. |
| − | # '''OffsetMillimeters''' | + | # '''OffsetMillimeters''': if specified, this value will be added to the position of the detected marker when displaying the 3D object. The offset can be defined along the X, Y and Z axis. |
| − | # '''RotationDegrees'''. | + | # '''RotationDegrees'''. if specified, the 3D object will be rotated by this value against the detected marker. |
| − | * ''Resource path example'' | + | |
| + | * ''Resource path example'' | ||
| + | <source lang="xml"> | ||
| + | pump/pump.obj | ||
| + | </source> | ||
| + | |||
* ''OffsetMillimeters example''. | * ''OffsetMillimeters example''. | ||
<source lang="xml"> | <source lang="xml"> | ||
| Line 76: | Line 135: | ||
</OffsetMillimeter> | </OffsetMillimeter> | ||
</source> | </source> | ||
| − | |||
| − | |||
| − | |||
| − | |||
| − | |||
| − | |||
| − | + | In the following rotation example the user must see the 3D object rotated around X axis and around Z axis 90 degrees. | |
| − | = | + | Note that the angle is in radians. |
| + | * ''RotationDegrees example''. | ||
| + | <source lang="xml"> | ||
| + | <Rotation> | ||
| + | <X>0.5707</X> | ||
| + | <Z>0.5705</Z> | ||
| + | </Rotation> | ||
| + | </source> | ||
| − | + | === Displaying movies === | |
| − | + | ||
| − | == | + | Inside the ''MovieAction'' tag there can be two possible resources defined, a '''MovieResource''' and a '''PlayButton''' resource. |
| + | |||
| + | ==== MovieResource Tag==== | ||
| + | |||
| + | Movies can be displayed using the ''<MovieResource>'' tag, which basically contains the same values as the ''GeometryResource'', except the rotation vector. | ||
| + | |||
| + | ==== PlayButton Tag==== | ||
| + | By using the ''<PlayButton>'' tag, the movie will not start immediately but there will be a geometry shown in between which basically contains the same values as the ''GeometryResource'' tag. Its purpose is to start the video only when this intermediate geometry is touched. | ||
| − | |||
| − | |||
| − | |||
| − | |||
<source lang="xml"> | <source lang="xml"> | ||
| − | < | + | <MovieAction> |
| − | < | + | <MovieResource> |
| − | + | ... | |
| − | + | </MovieResource> | |
| − | + | <PlayButton> | |
| − | </ | + | <Scale>150</Scale> |
| + | <ResourcePath>plane/plane.obj</ResourcePath> | ||
| + | <RotationDegrees> | ||
| + | <Z>3.14</Z> | ||
| + | </RotationDegrees> | ||
| + | </PlayButton> | ||
| + | </MovieAction> | ||
</source> | </source> | ||
| − | == ''' | + | === Displaying an UBIK object dialog === |
| − | In order to use the previously configured | + | |
| + | The ''<UBIKObjectAction>'' allows to bring up a popup to navigate to an {{UBIK}} object when scanning either a picture or an ID marker. The tag must contain the tracking ID attribute and, optional, the ''<UBIK-UID>'' tag. | ||
| + | When configuring a tag without the ''UBIK-UID'' sub-tag, the object is searched based on the value of its ''MarkerID'' property, which is compared to the value of the ''TrackingID'' attribute. If the ''UBIK-UID' tag exists the object is searched based on the value inside the ''UBIK-UID' tag. | ||
| + | |||
| + | = Example = | ||
| + | In order to use the previously configured xml's, you can use either the ID Marker activity or the Markerless activity on the {{UBIK}} Android Client. | ||
| + | |||
=== ID Marker Activity === | === ID Marker Activity === | ||
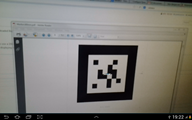
| − | Having in mind the setup tracking | + | The ID markers used can be found at the following link {{FileLink|ID_Marker_Example_1_6.pdf|ID Marker Example Ids 1-6}}.<br> |
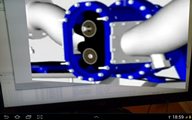
| − | + | Having in mind the setup tracking IDs, you can now scan ID markers. | |
| − | If the | + | * For an ID that has a 3D object mapped in the action xml, the object should be displayed on the screen as shown in the next picture. |
| − | If the play button exist | + | * If the ID has a video object mapped in the action xml, you should see a video object on the screen, depending on the existence of the play button. Clicking the play button starts the video. |
| − | + | * If the play button exist you should see first see the play button, and after it's clicked the mapped video. If the play button doesn't exist, a movie preview image will be shown. Clicking the image starts the video. | |
=== Markerless Activity === | === Markerless Activity === | ||
| − | |||
| − | === | + | The markerless photos used in this example can be found at the following link {{FileLink|Markerless_Examples._Pics_1-7.pdf|Markerless example pictures}}.<br> |
| + | The scenario is very similar with the ID marker activity with the only difference that instead of IDs you have to scan your tracking images. | ||
| + | |||
| + | === Results === | ||
| + | |||
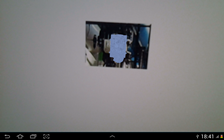
| + | With the existent configuration from the .zip file, you should see the following picture when scanning the first ID or the first picture: | ||
| + | :[[File:scanning_id1.png|border]] <br> | ||
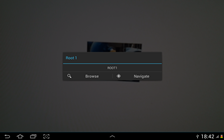
| − | + | When scanning the second ID or the second picture, you should see the following: | |
| − | :[[File: | + | :[[File:scanning_id2.png|border]] <br> |
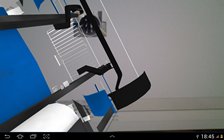
| − | When scanning the | + | When scanning the sixth ID, using the Markerless activity, you should see a play button and, if pressed, a movie. |
| − | :[[File: | + | * Play button: |
| + | :[[File:scanning_id3_play_button.png|border]] <br> | ||
| + | * Movie: | ||
| + | :[[File:scanning_id3_movie.png|border]] <br> | ||
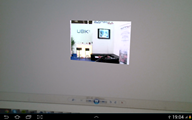
| − | When scanning the sixth | + | When scanning the sixth ID using the IdMarker Activity you should see a play button also and, if pressed, a movie too. |
| − | + | * Play button: | |
| − | :[[File: | + | :[[File:scanning_id6_play_button.png|border]] <br> |
| − | Movie: | + | * Movie: |
| − | :[[File: | + | :[[File:scanning_id6_movie.png|border]] <br> |
| − | + | [[Category:Client|Configure Dynamic AR Content]] | |
| − | + | [[Category:How-To|Configure Dynamic AR Content]] | |
| − | + | [[Category:POI|Configure Dynamic AR Content]] | |
| − | + | ||
| − | + | ||
| − | [[Category:How-To]] | + | |
| − | [[Category: | + | |
Latest revision as of 09:28, 20 May 2015
The Dynamic AR Content feature allows the user to see different content according to a marker configuration. The configurable content are 3D objects, movies and UBIK® objects. Currently this feature is enabled for ID Markers and Markerless scanning, meaning image tracking. Therefore, every time the user has scanned an ID marker or a picture, the corresponding object (3D object, movie or UBIK® object) will be processed and, according to the configuration, displayed on the screen.

