Difference between revisions of "HowTo:Connect To Oracle With A Workflow"
| Line 43: | Line 43: | ||
[[Category:OLE]] | [[Category:OLE]] | ||
[[Category:Activities]] | [[Category:Activities]] | ||
| − | |||
[[Category:How-To]] | [[Category:How-To]] | ||
Revision as of 17:20, 2 February 2015
Before being able to connect to an oracle database it is necessary to configure the connection to the server on your local environment. UBIK uses OLEDB to connecti to Oracle via TNS (Transparent Network Substrate). 1. After installing the oracle client you have to configure the oracle server in the TNS Names:
In [ORACLESOFTWARE]\network\admin\ you can find "tnsnames.ora". Configure the connection and call it (like in this example TESTDB):
TESTDB=
(DESCRIPTION =
  (ADDRESS_LIST =
    (ADDRESS = (PROTOCOL = TCP)(Host =AUGTESTORACLE.cloudapp.net)(Port = 1521))
  )
(CONNECT_DATA =
  (SERVICE_NAME = UBIKTEST)
)
)
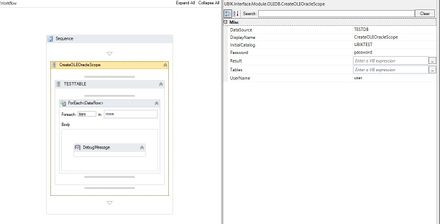
2. Use a "CreateOLEOracleScope" Activity to configure the connection.
You have to configure the connection to the Oracle database DataSource, the InitialCatalog and you need to fill out UserName and Password.
3. Use a "CreateOLETableScope" or a "CreateOLEQueryScope" to define the table you want to fetch data from.
Configure the tablename in DisplayName.
4. Use a ForEach<DataRow> Activity to iterate over the records in the table.
5. Access the columns of the record by using the index of the column.
Example Workflows:
Connecting to oracle DB and fetch data with a CreateOLETableScope: Oratest.uwf

Connecting to oracle DB and reading data with a CreateOLEQueryScope: Example workflow sql statement.uwf
